After spending a lot of time fixing my taco bed, I’ve now run into a problem I can’t seem so solve.
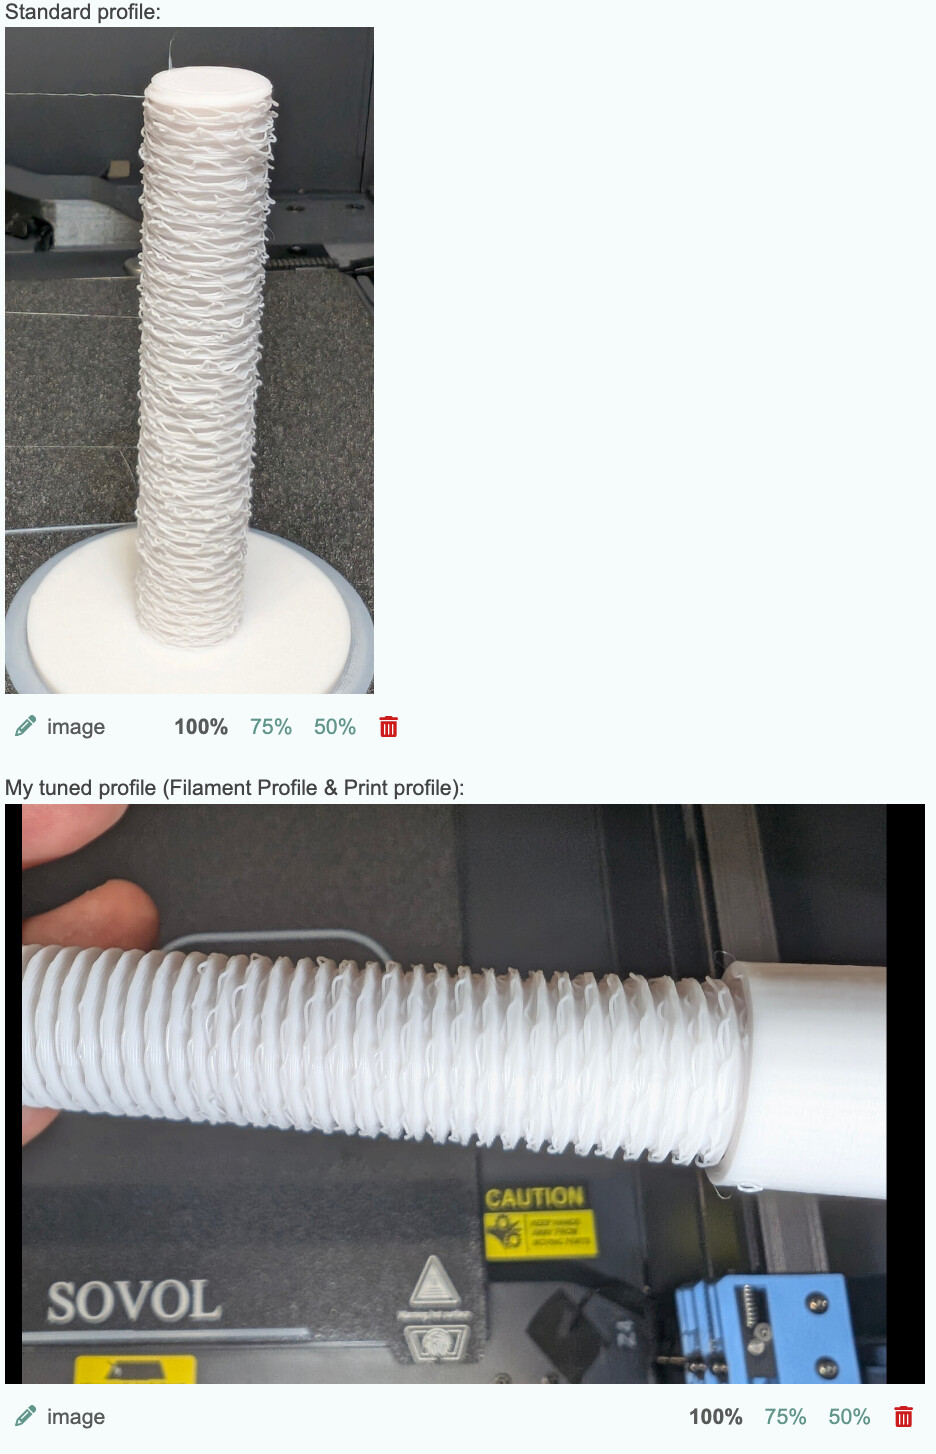
My overhangs (and bridges) are terribly droopy. The standard profiles in Orca are a complete mess. After spending a lot of time with calibration, it’s gotten better, but the results are still “unusable prints”.
Now at this point, I’m at my wits end. All calibration tests (temp, flow, retraction, PA) are fine, printing the “screw” on my Bambu yields a perfect result. Filament (Sunlu Pla+ white) is bone dry and in a dry box.
Am I missing something? Is there anything else I can try? Or is my nozzle broken/head broken and I’m just waisting my time?
I’m open to all suggestions then can help fix this mess, thank you in advance.
It’s not a cooling issue. Fan is set at a 100%, and verified to blow. It feels to me a bit like my layers are too thin for their height. I did a test print of the screw at 0,12mm layer height and the result looked a lot better, no droopiness. But it takes close to double as long, and with the size of the SV08, printing always at 0,12mm height is not really an option.
Thicker layer needs MORE airflow to solidify before is sags. I’ve not seen anyone else with a SV08 complaining about cooling but for whatever reason you need more cooling. Fan may not be hitting rated speed due to bearing drag or high electrical resistance.
OR lower your parameter speed.
Lowering nozzle temp will reduce sags too but may impact layer adhesion and/or surface smoothness.
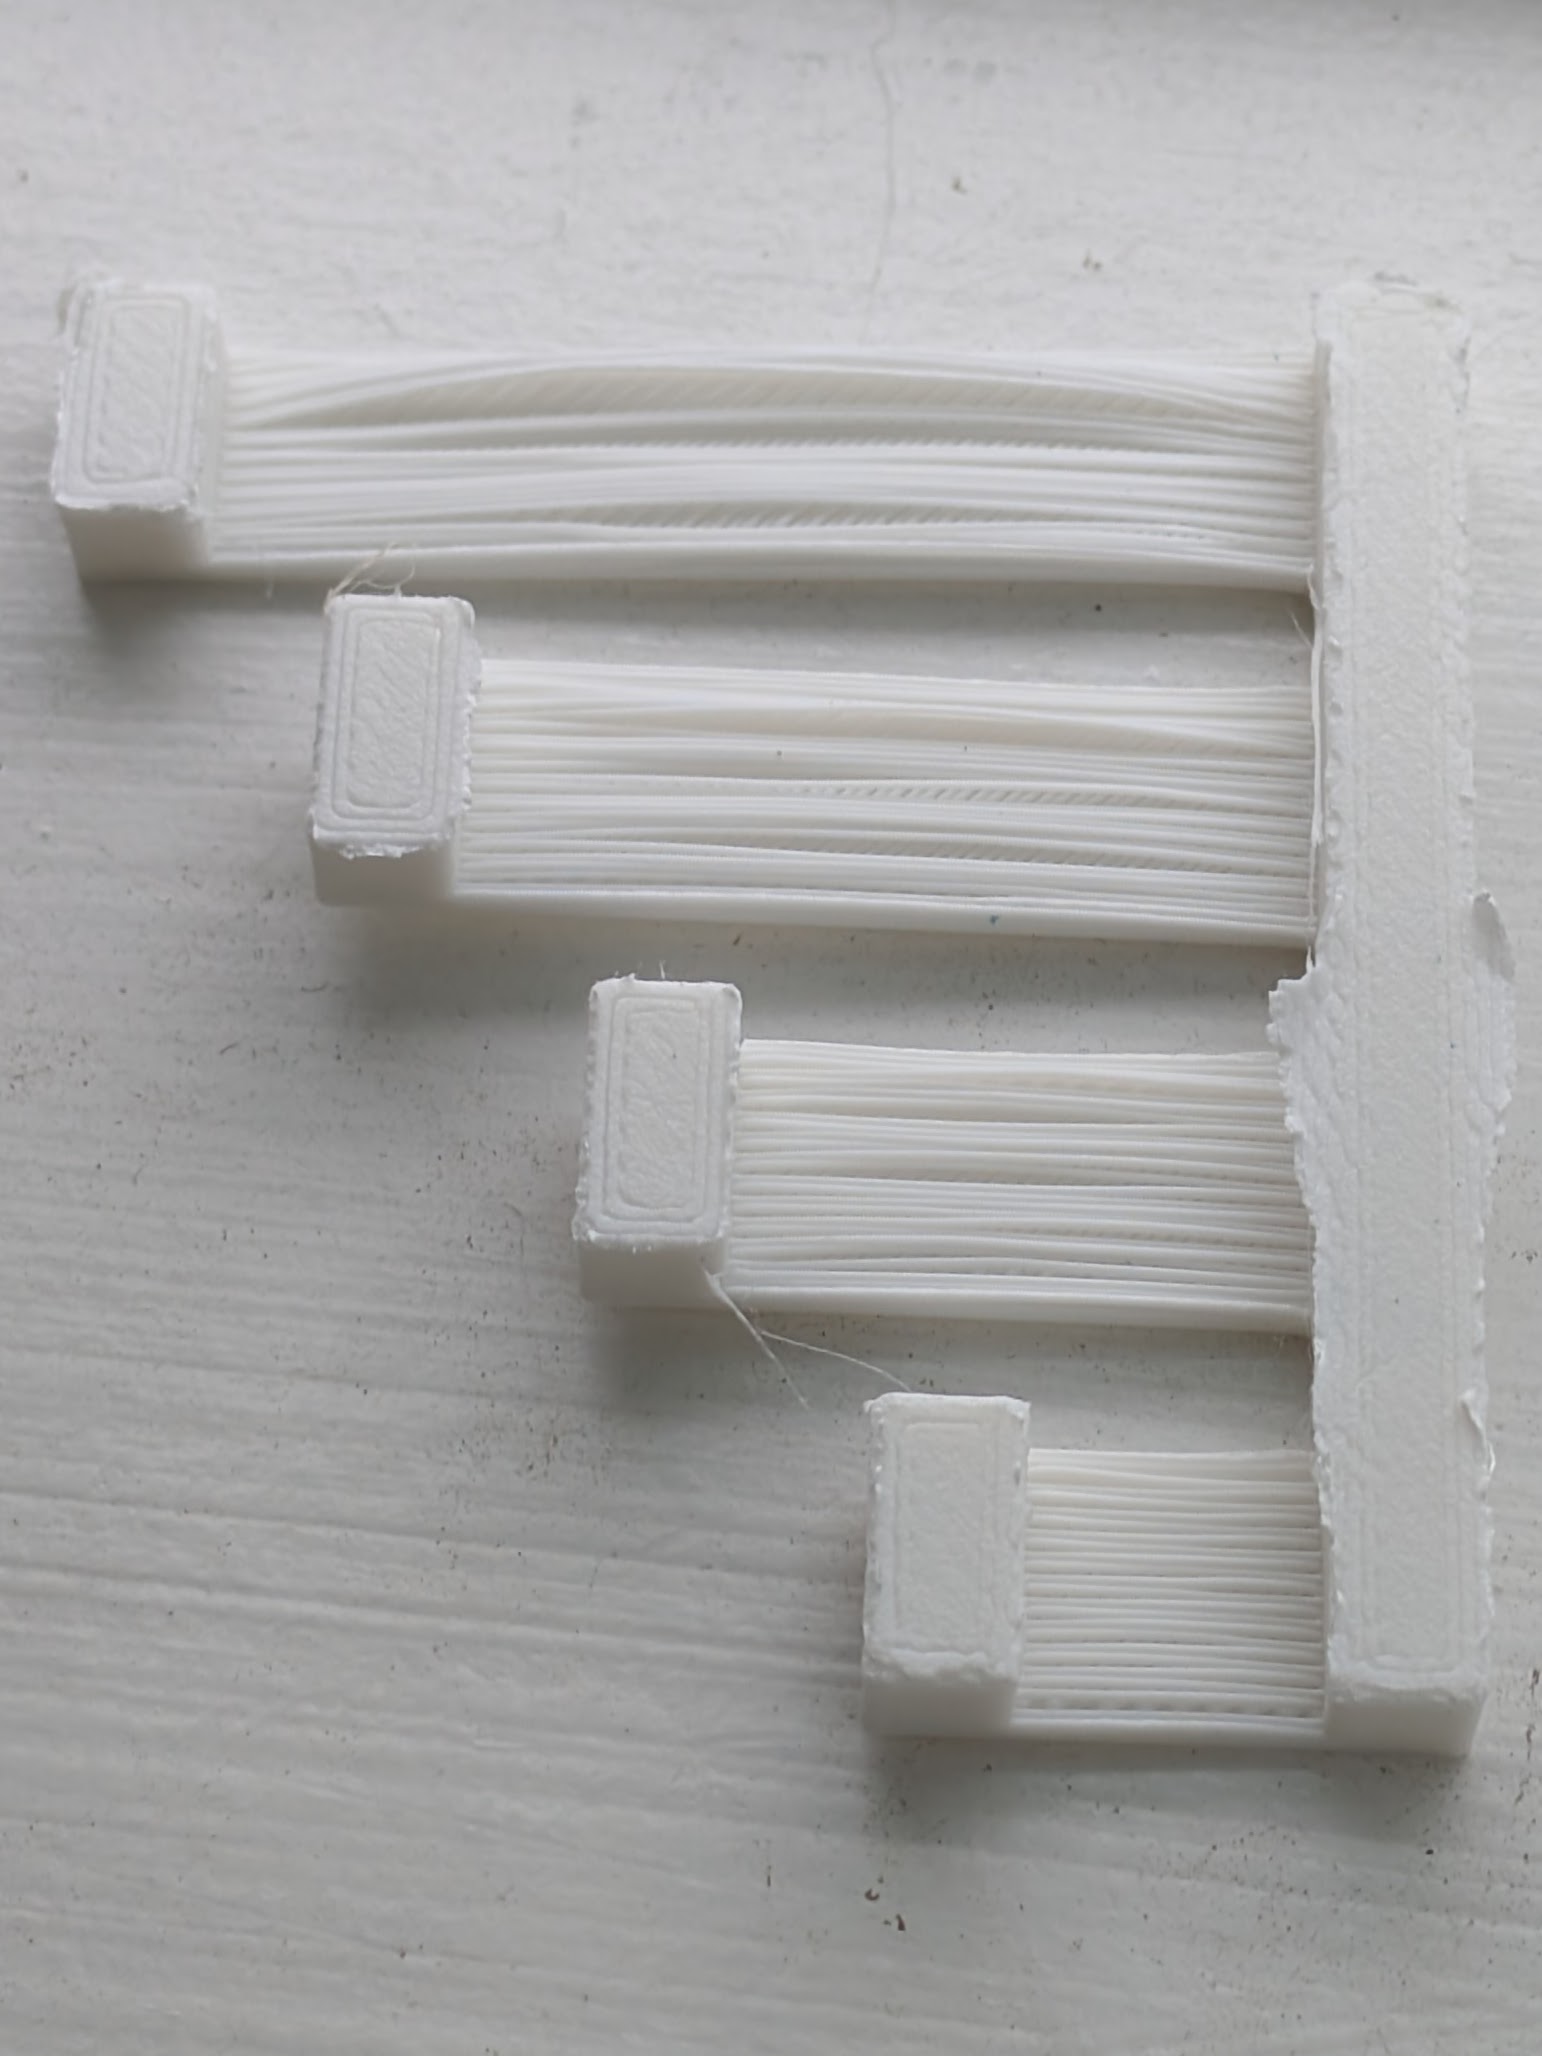
Last week, I did some test bridges (https://makerworld.com/en/models/43725-bridging-test-5-to-100-mm?from=search#profileId-45011). Lowering the speed didn’t bring any benefits. Setting it higher than the base speed at 60mm/s improved my results a lot. Any lower speed, I get a “droopy hang” for like 4 mm, followed by a straight line when the filament “stabilizes”. I’ll print another bridge test to add a photo.
Below the same print, left at 0,20mm layer height at default settings, right at 0,12mm height with my after-calibration-settings. Both run at 100% cooling.
Today’s bridge vs a shorter screw with overhangs. Overhang is a catastrophe.
For the bridge:
5mm and 10mm are perfect.
20mm is good enough imho.
40mm would do in a pinch, but that’s already a looooong distance.
60mm to 100mm is not great, but I wouldn’t expect anything else.
Yes, both are running. However, I did a “feel test”. The produced air does not seem very strong, but my only comparison is my A1 mini, that blows a lot stronger.
Fans are getting full power. Thank you already so much, but at this point I’ll escalate to support, see what their input is. I’m really starting to think something’s broken.
I’ve just started getting my SV08 up and running and am currently printing a temperature tower. My initial feeling (looking at the bridges on my temp tower) is that there’s actually too much airflow from the front fan which is blowing the extrusion down.
It might be better to print the bridges faster with the front cooling fan off and the back cooling fan at full as this seems to blow much more across the nozzle than down. I’ll report back as I start to get things dialled in.
The overhangs changing based on layer height might indicate that they’re too steep. Have you tried setting the wall order to Inner → Outer and seeing if that improves it? Can you link the screw model so I can take a look in a slicer?
Great, I’ll be looking forward to your experiences. And yes, faster bridges were better than slower ones in my tests, going up to 60mm/s. As far as wall order goes, changing between In->Out and Out->In didn’t have any effect, that’s why my thinking was that my lines were “too thin”.
My initial results are that faster seems to be much better. The difference between these two (standard Orca temperature test tower) is just speed, faster on the right. I’d be inclined to turn off “Slow down for overhangs” and bump your external bridge speed to whatever your outer wall speed is and see how you get on.
Oh, I should also say that I bumped my line widths before I did anything else. It looks like that model should be okay at 0.2mm layers with 0.4mm wall lines but I normally run 150% (i.e. 1.5 x nozzle_diameter, giving 0.6mm on a 0.4 nozzle) but you could try increasing your Outer wall line width if it’s somewhere close to your nozzle diameter.
This is a section of that model printed at 200mm/s (no slowdowns for anything) at 0.32mm layers, 0.6mm line width. It’s not super clean but looks as I’d expect given those settings (especially the layer height).
My experience has also been that the default speed for 100% overhangs is way too low. I’ve bumped that up and haven’t any any real issues with it anymore.
Hey, sorry for my long absence. I’ve been in contact with (the amazing) Sovol support, and my printer is definitely not defective. Support got me a gcode file that resulted in a near perfect print:
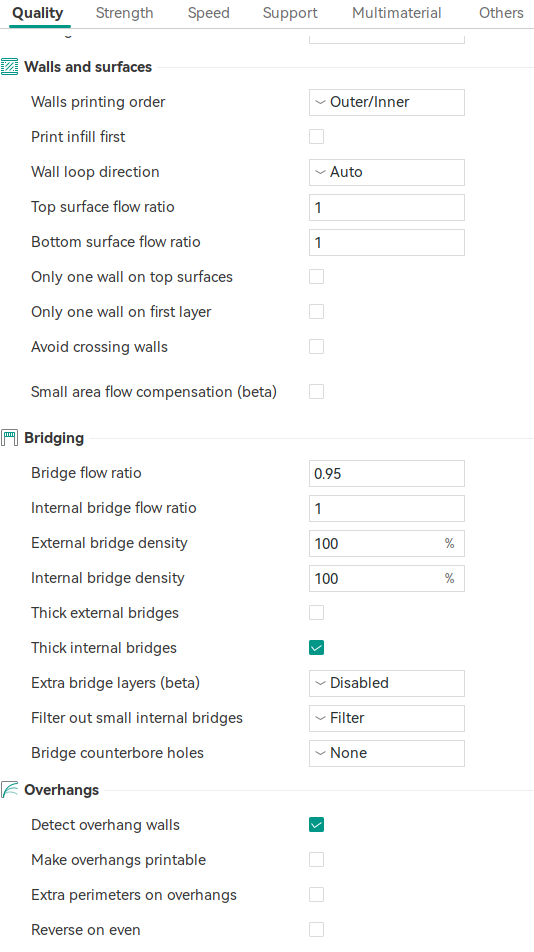
I’ve received the config parameters today, I’ll post screenshots as soon as I get the time. This is at reduced layer height and speed, but a great result nonetheless.
I’ve been fighting with this since I got the SV08 and even tried printing different print heads with different cooling angles and it definitely seems like the front fan (which is absolutely huge btw) is blowing the filament down.
I tried @Pykkles recommendation and that seemed to resolve the overhang issue for me.
Assuming all defaults for the generic PLA profile in Orca Slicer:
In filament cooling setting: Deselect “Slow printing down for better layer cooling”
In process speed settings: Deselect “Slow down for overhangs”, increase bridge external speed to 200mm/s and internal bridge speed to 100mm/s
Edit: the increased speed made my benchy very stringy and I noticed the bow portholes still had some top droop. The default retraction is only 0.5mm so I’ll try increasing that and do a screw print to see how it fares.
I’d be curious if even faster speeds would make the longer bridges more successful…