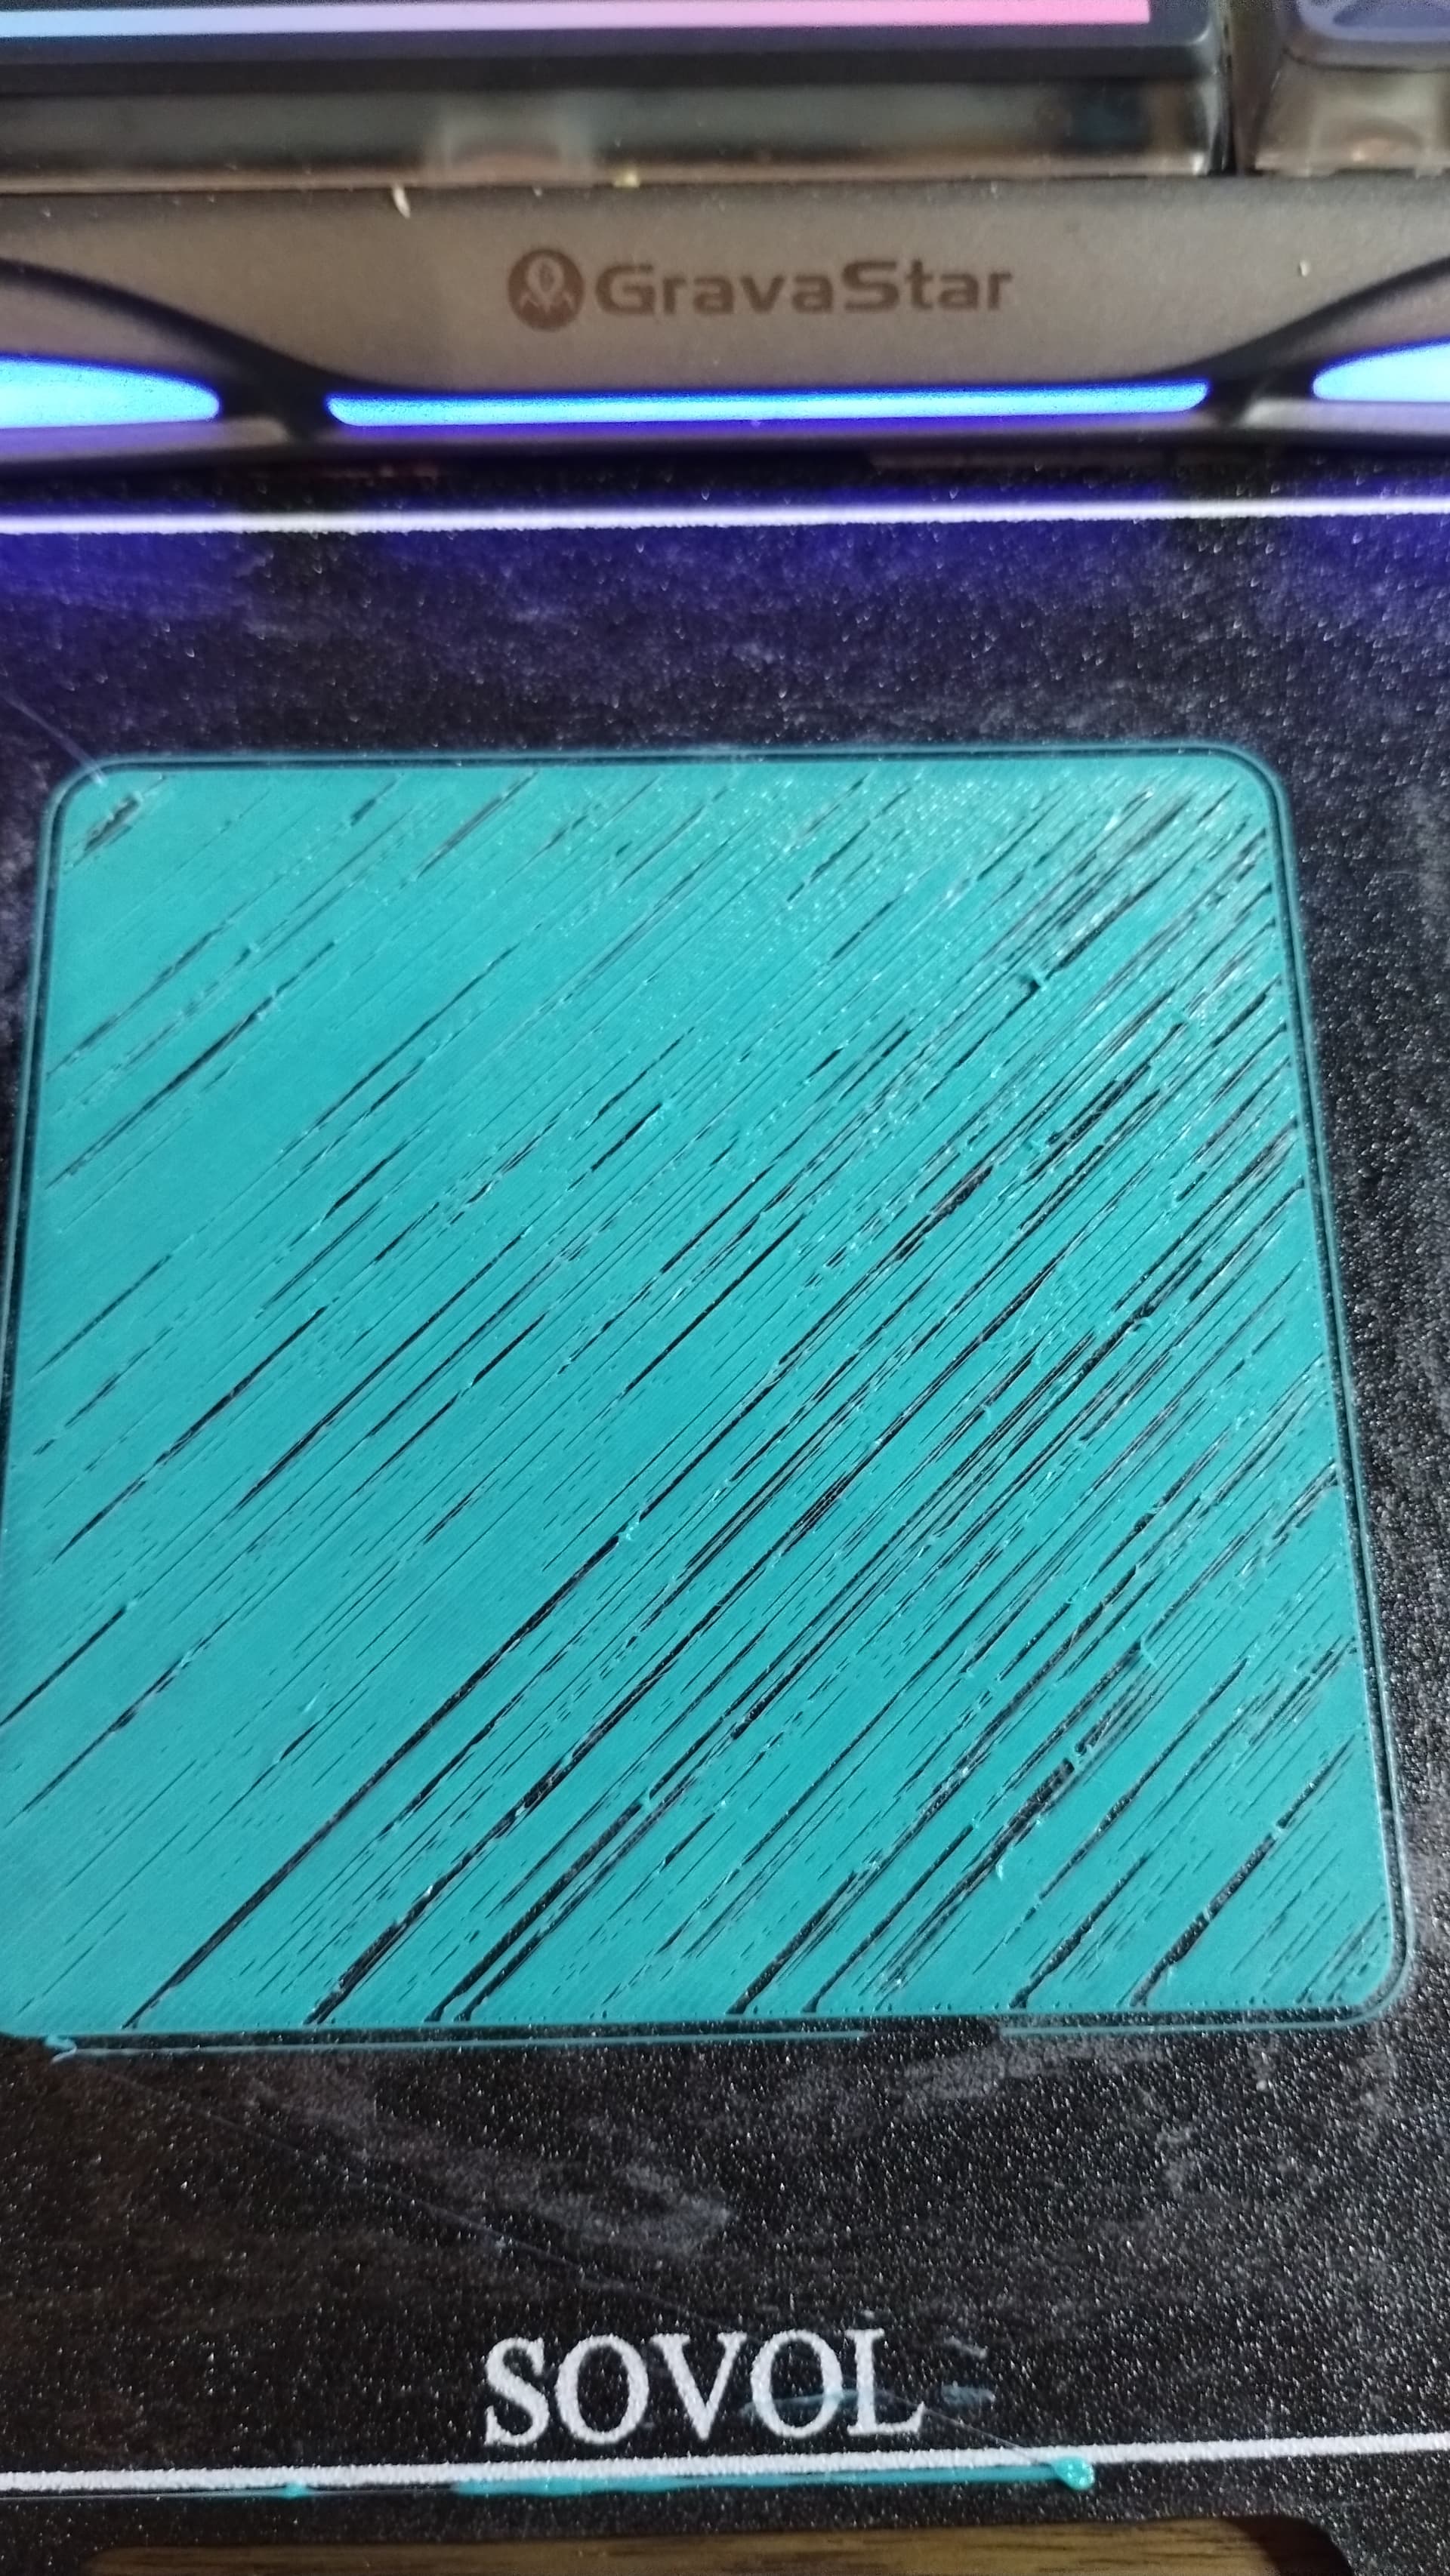
This is how the printer started printing on an “every print” basis as of today. Last night and since set up of the Zero things have been perfect pretty much. I have not changed anything with printer or with slicer with exception of this morning I reduced my Max acceleration to 10000 instead of 400000, which made no difference. It’s the same roll of filament, which printed flawless last night, shut machine down and restarted this morning to end up with this disaster. With no changes made and such drastic failure, I am thinking the extruder motor might be fried, but want to confirm with the general public before I make that final decision. Any other ideas before I do physical repairs?
Clean the plate, get the glue off & run the calibrations from the settings menu.
Been done multiple times. Cleaned plate, recalibrated, ran first layer, put glue back down, ran first layer…all the same

Lower the bed 100 mm and manually extrude 50mm (about 10 times)
Filament string is round and comes out straight down?
You wouldn’t be the first to discover a metal shaving embedded in a roll of filament.
Did that with no change, but I did notice something a little odd and thought…maybe???
So I grabbed the filament between the roll and the run out sensor and gave it a little extra push into the machine. The outcome was a 100% better
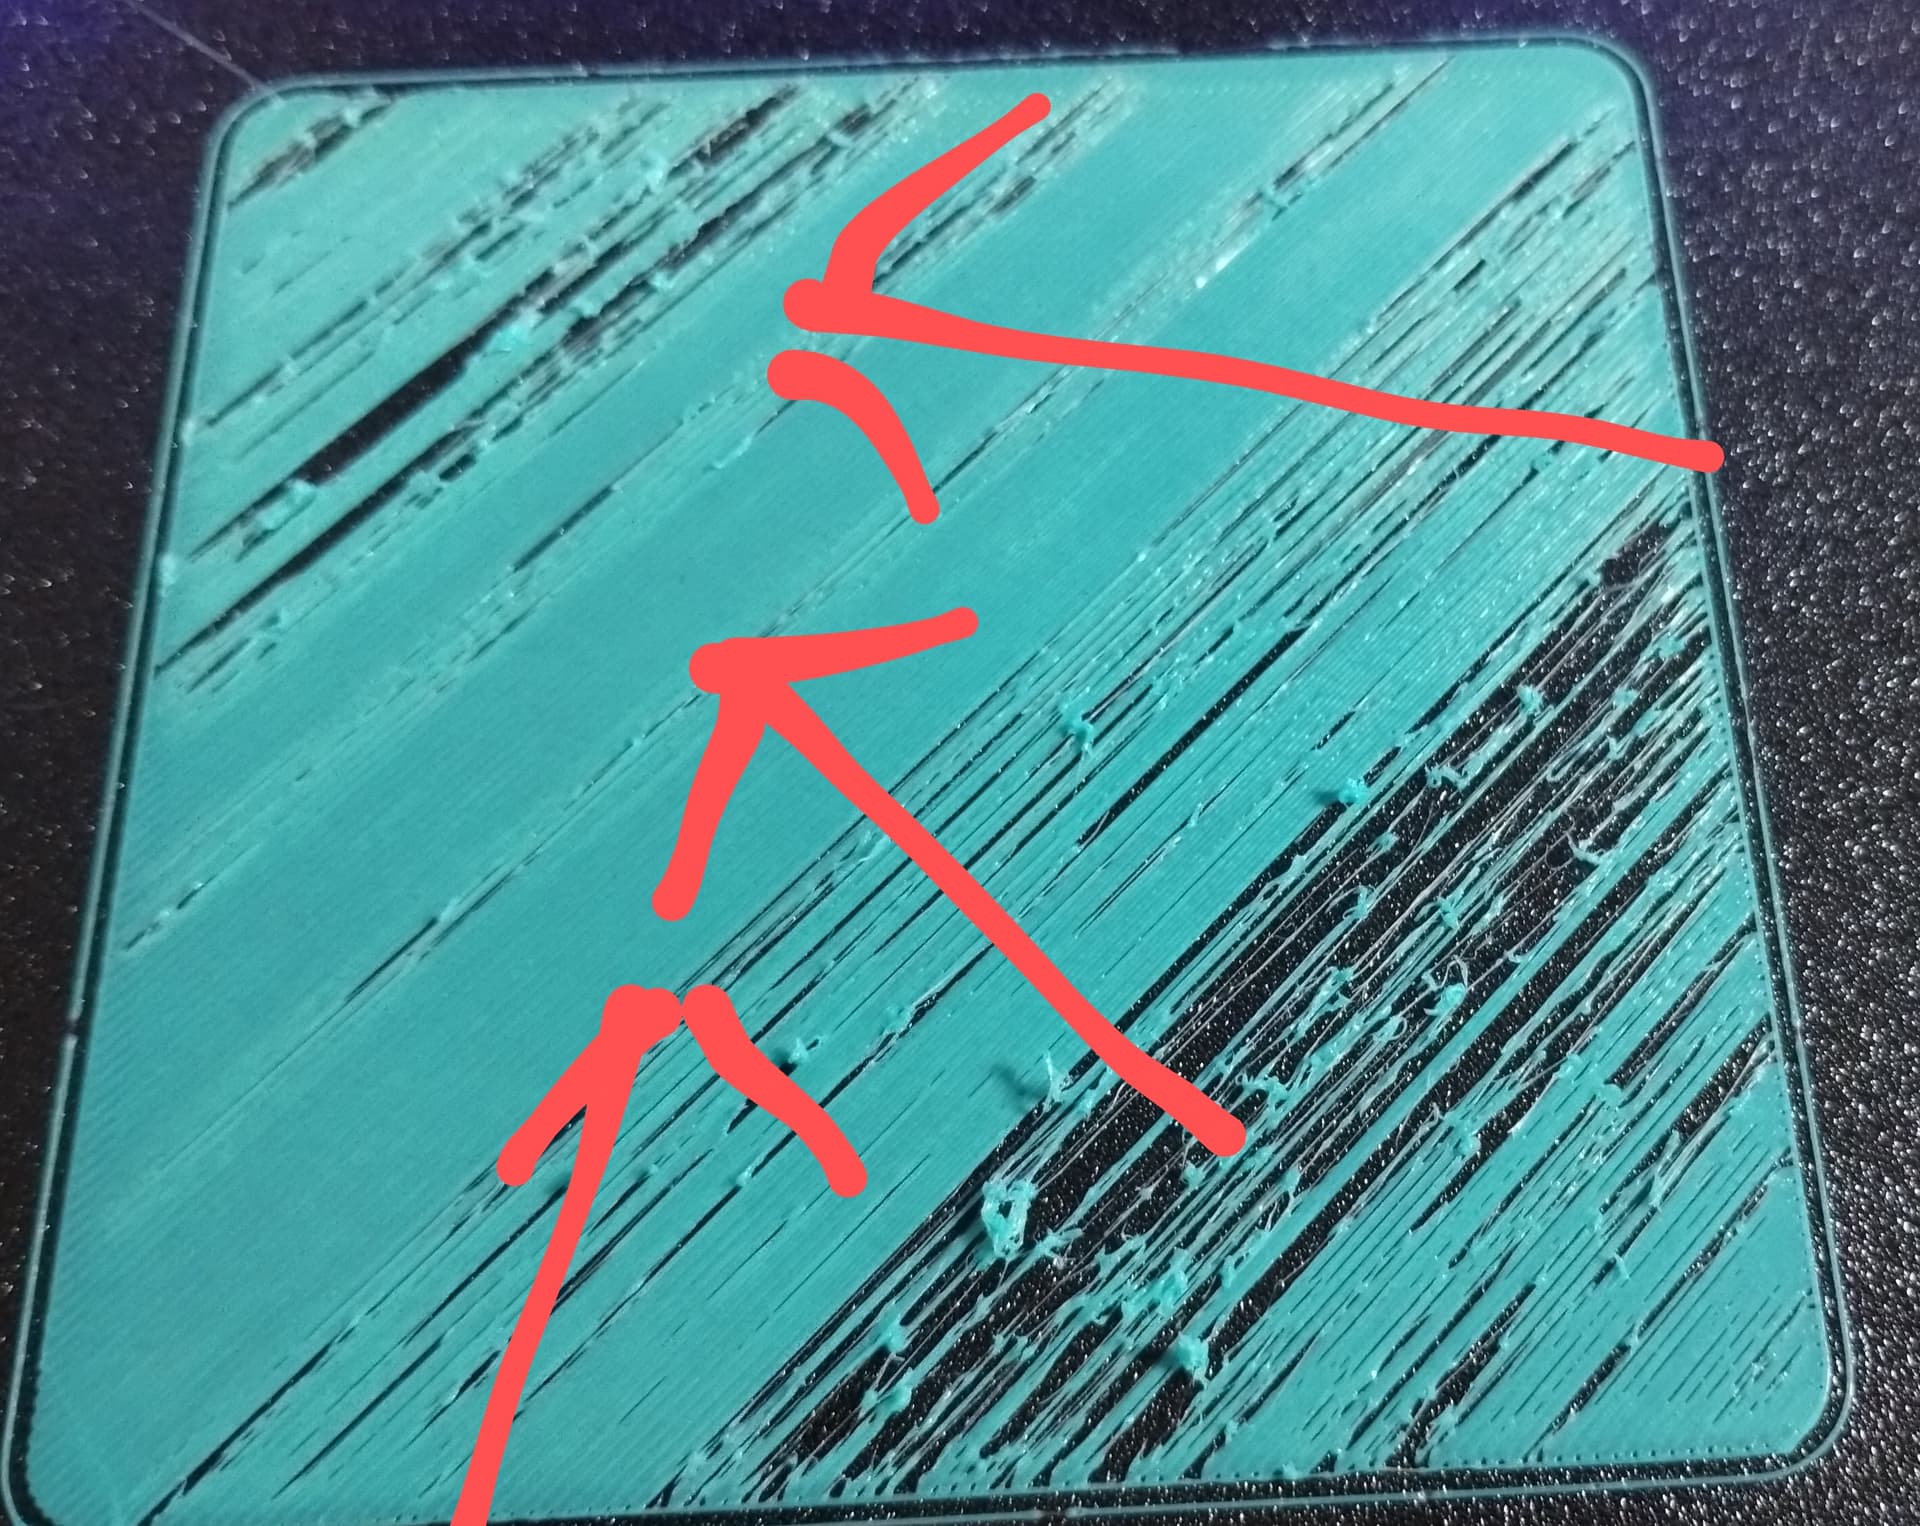
The arrows indicate where I assisted the filament. I haven’t figured out what is causing this drag yet, but I have a place to start now. I’m going to bypass the filament run out sensor next, but any other suggestions to relieve this drag or tension on the filament would be appreciated in case I can’t find it in the mean time
As a quick-down-and-dirty, you can always just disconnect the tubing at the toolhead and pull filament through by hand and see if it feels like there’s an unusual drag.

The washer and spring on the filament tension arm can become bound, resulting in low tension on the filament in the extruder gears and under extrusion. I’d fiddle with the tension adjustment screw, and particularly unscrew it completely, disassemble it (screw, spring, washer) and while the arm is down, pull out the filament and take a good look to ensure the extruder gears are not clogged. Turn the knob on the back of the extruder to examine the entire drive gear. It could have embedded debris on the side you can’t see. Manually rotate the idler gear to inspect all of it. Push the idler gear toward the drive gear and ensure that the groves that grip the filament align properly on both sides.
Reassemble and pay attention to the spring and washer to ensure they are working as designed to tension the idler properly. With the steppers engaged (the little orange icon in Mainsail to the right of the Home All button above the manual tool head positioning), you should not be able to pull the filament up and out of the extruder without a lot of force. If you can, the tension is bad and the extruder is slipping and under extruding.
I’ve had exactly the failure you’re showing, suddenly occurring, and it was this low tension under extrusion.
When I have the extruder open, I also check the set screw on the drive gear. If it’s loose, the stepper motor can be spinning but the extruder will be slipping, causing a similar under extrusion. Check this by jamming a tool into the drive gear to bind it and try to turn the wheel on the back of the extruder motor with the motors disabled.
We cross posted. Glad I added the set screw check process at the end… that you figured out on your own. ![]()
You might want to put some blue Loctite on that set screw.
Funny thing is, after all reassembled I only thought of that. I have blue loctite in bulk for my Remote Control habit and addiction. I even was trying to explain to the wife about the printer and then thought the easiest way is explaining how my pinions loose their grub screws and I end up cracking the shits cause I have to order more grub screws.
My set screw policy:
Leave them alone.
If one backs out, it gets the blue juice and then it’s torqued until 1/8th of a turn of stripping.
![]()
Mind the expiation date on your “blue juice”. Outdated juice sets too fast and ends up “absorbing” the tightening torque. Result is a screw “locked” only kinda tight.
Thread locking compound utilizes some peculiar chemistry. Oxygen prevents it from curing. That’s why the bottles are only half full. The thread locking compound cures in the anaerobic environment between threads. Excess thread locking compound pooled around a fastener won’t cure so people think the compound in the threads isn’t curing either.
It’s counter intuitive. Most of our experience is with epoxy that hardens when two parts are mixed, or paints and adhesives that cure when a solvent such as water or some volatile organic compound evaporates, or some anhydrous compound that cures after reacting with water vapor in the air such as RTV silicone. It seems weird that thread locker cures when deprived of oxygen, but that’s actually a great innovation that only cures when and where it’s needed.
Don’t squeeze the air out of the little tube of blue Loctite in your toolbox!