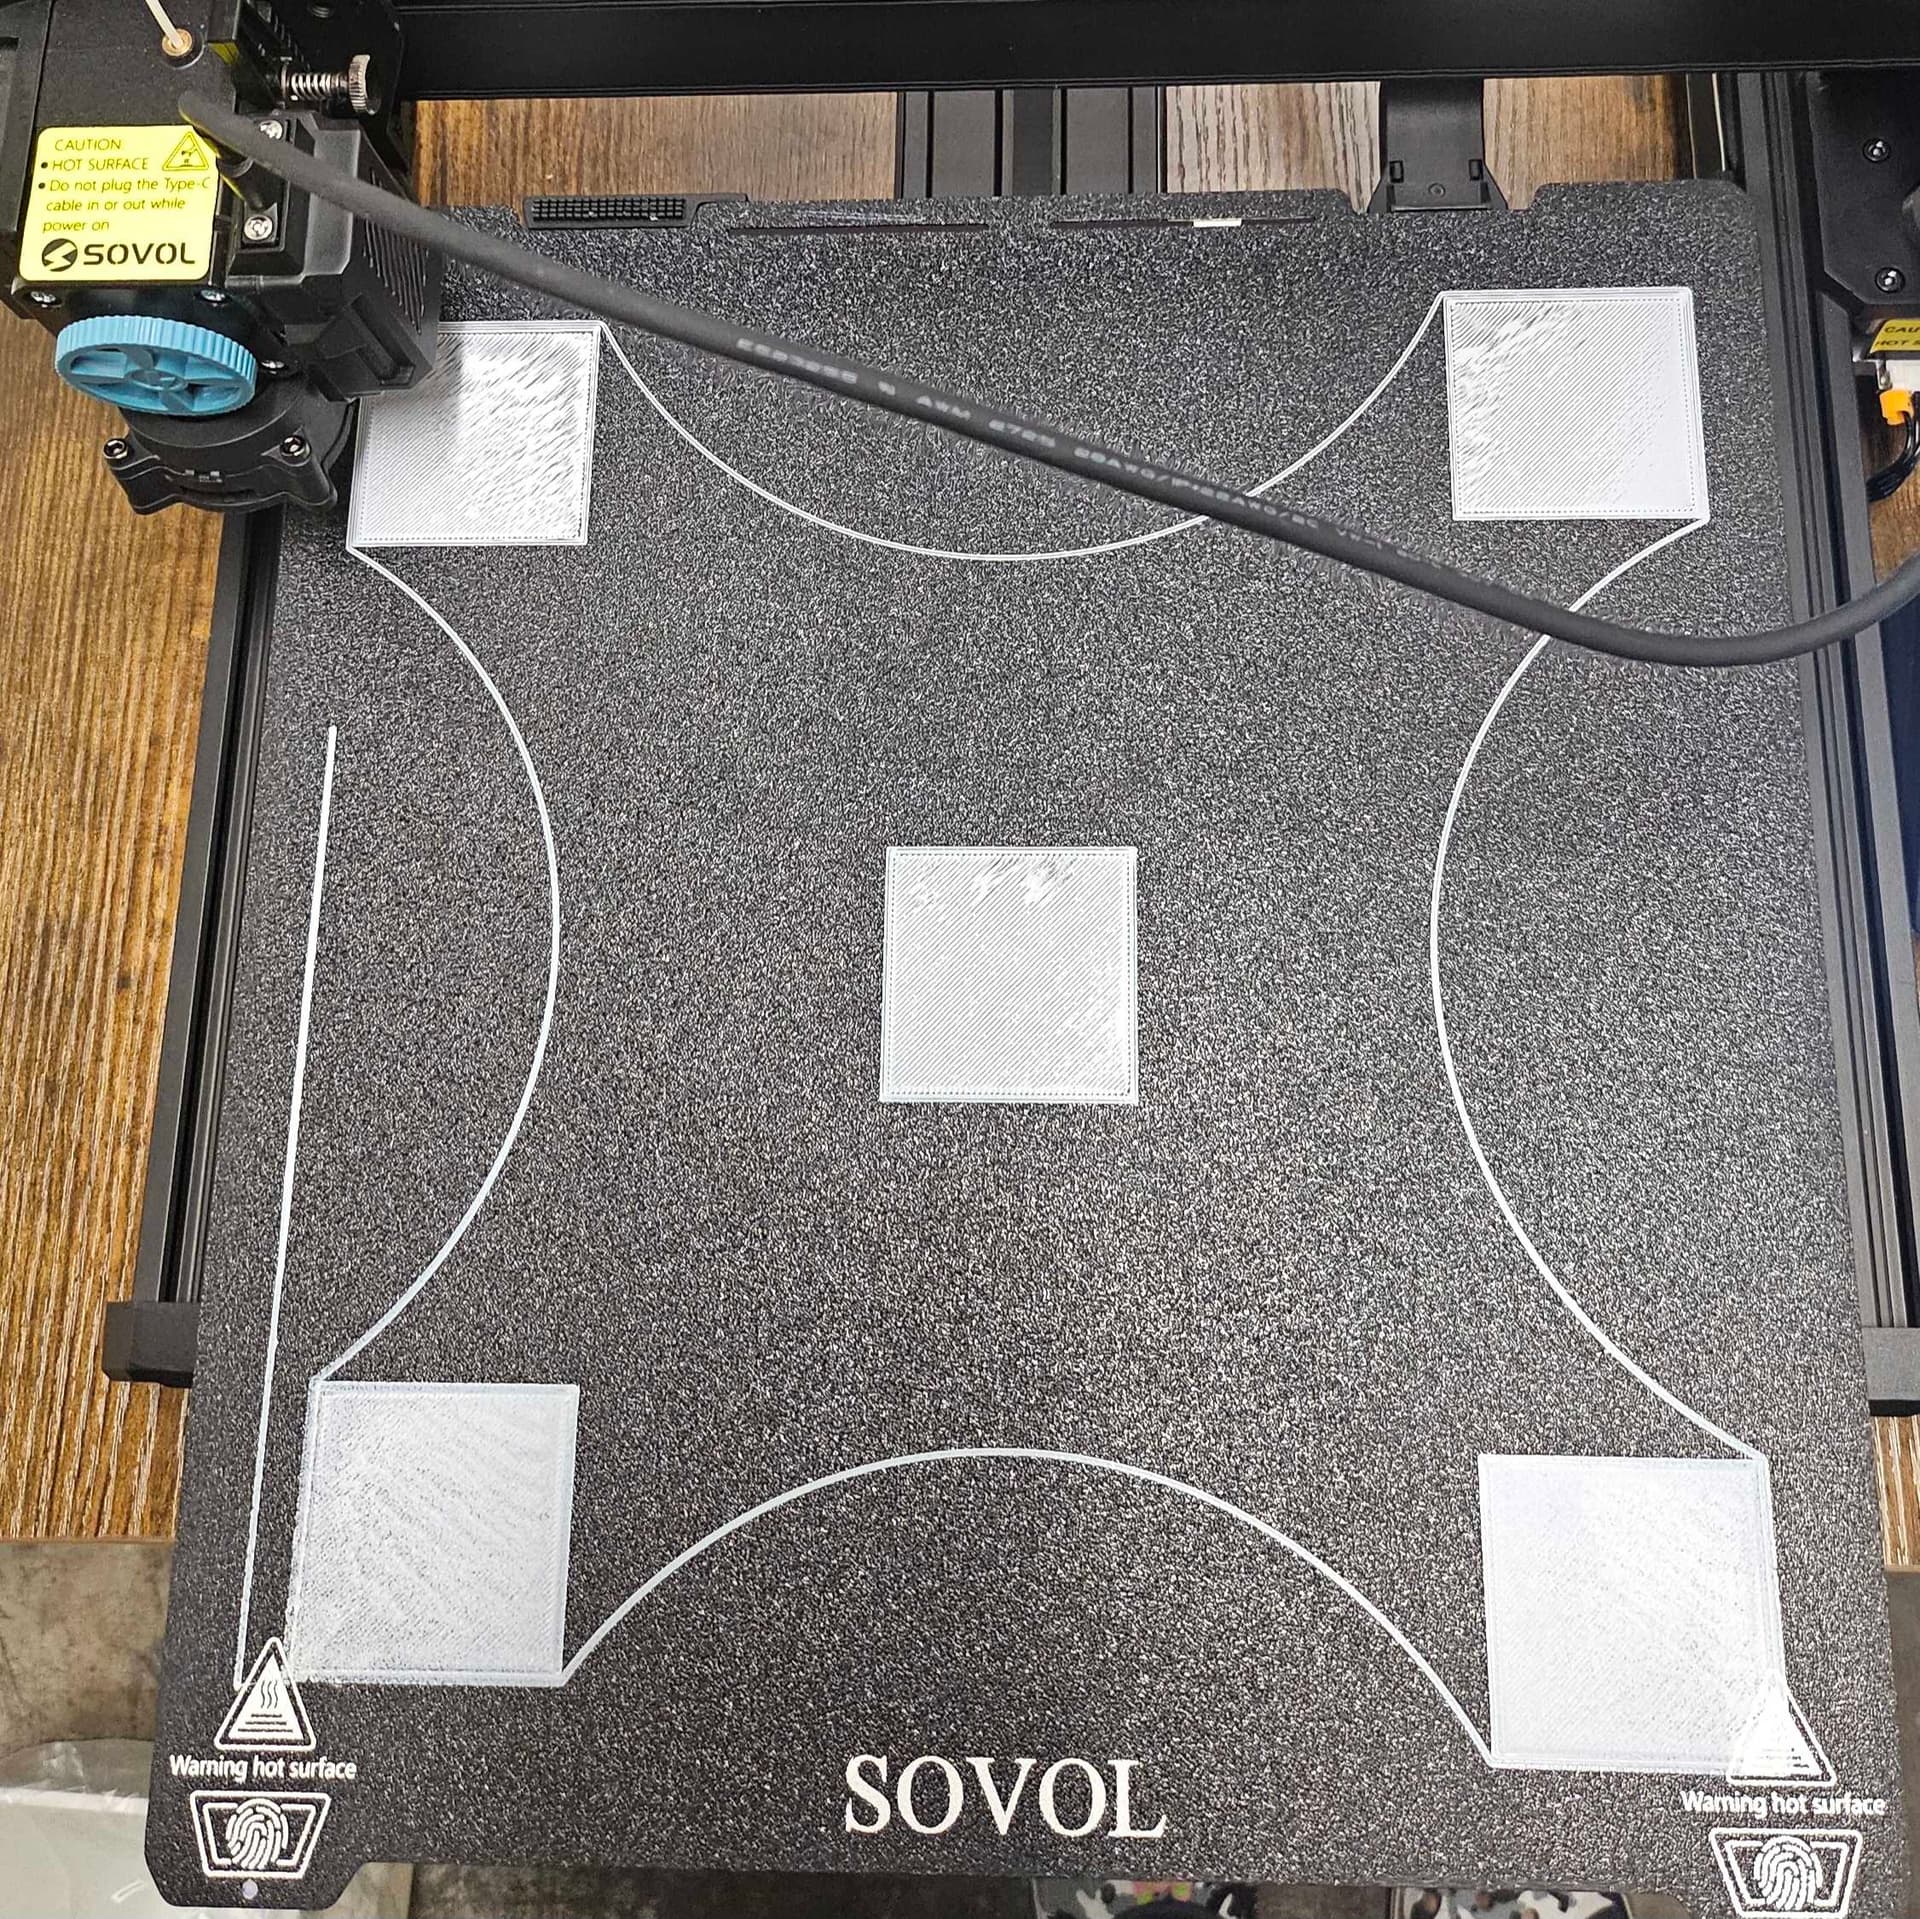
For the middle square + back squares the lines are not connecting whereas the two corners in the front are way too squished. After some research I suspect there is some x twist issue happening.
However, I could not find the sensor probe on the Sovol SV06 Plus ACE - I didn’t see any light go on/off as the nozzle head touched the bed.
I set the Z calibration using the sheet of paper technique.
I also have tried the full calibration in the printer settings, as well as resetting it to the factory default and doing the start up calibration again.
However each time doing this, the first layer test print always prints exactly the same, with the front 2 squares being too close to the bed and the back 3 being too far.
I got a heightmap of my machine, it is U shaped (I will see if I can attach pictures in the comments, the website is saying new users can only attach one media image):
Any suggestions on what I can do from here? Any help is greatly appreciated, thanks!
And in my test print the front two squares came out perfect, while the middle one was ok, and the back two, especially the back right, were still a bit stringy (picture in follow up comment)
However when I did my first real print, I noticed the brim lines still weren’t connecting, especially on the right side (picture in follow up comment).
Do you know what could be done to fix this? And what else can be done to level the bed some more? It looks like there are still two corners which are quite unlevel.
Also, I noticed if I ran the machine calibration, it undoes all the X Tilt changes and reverts it back to the initial highly skewed state I had shared earlier. Is there a way to fix this permanently?
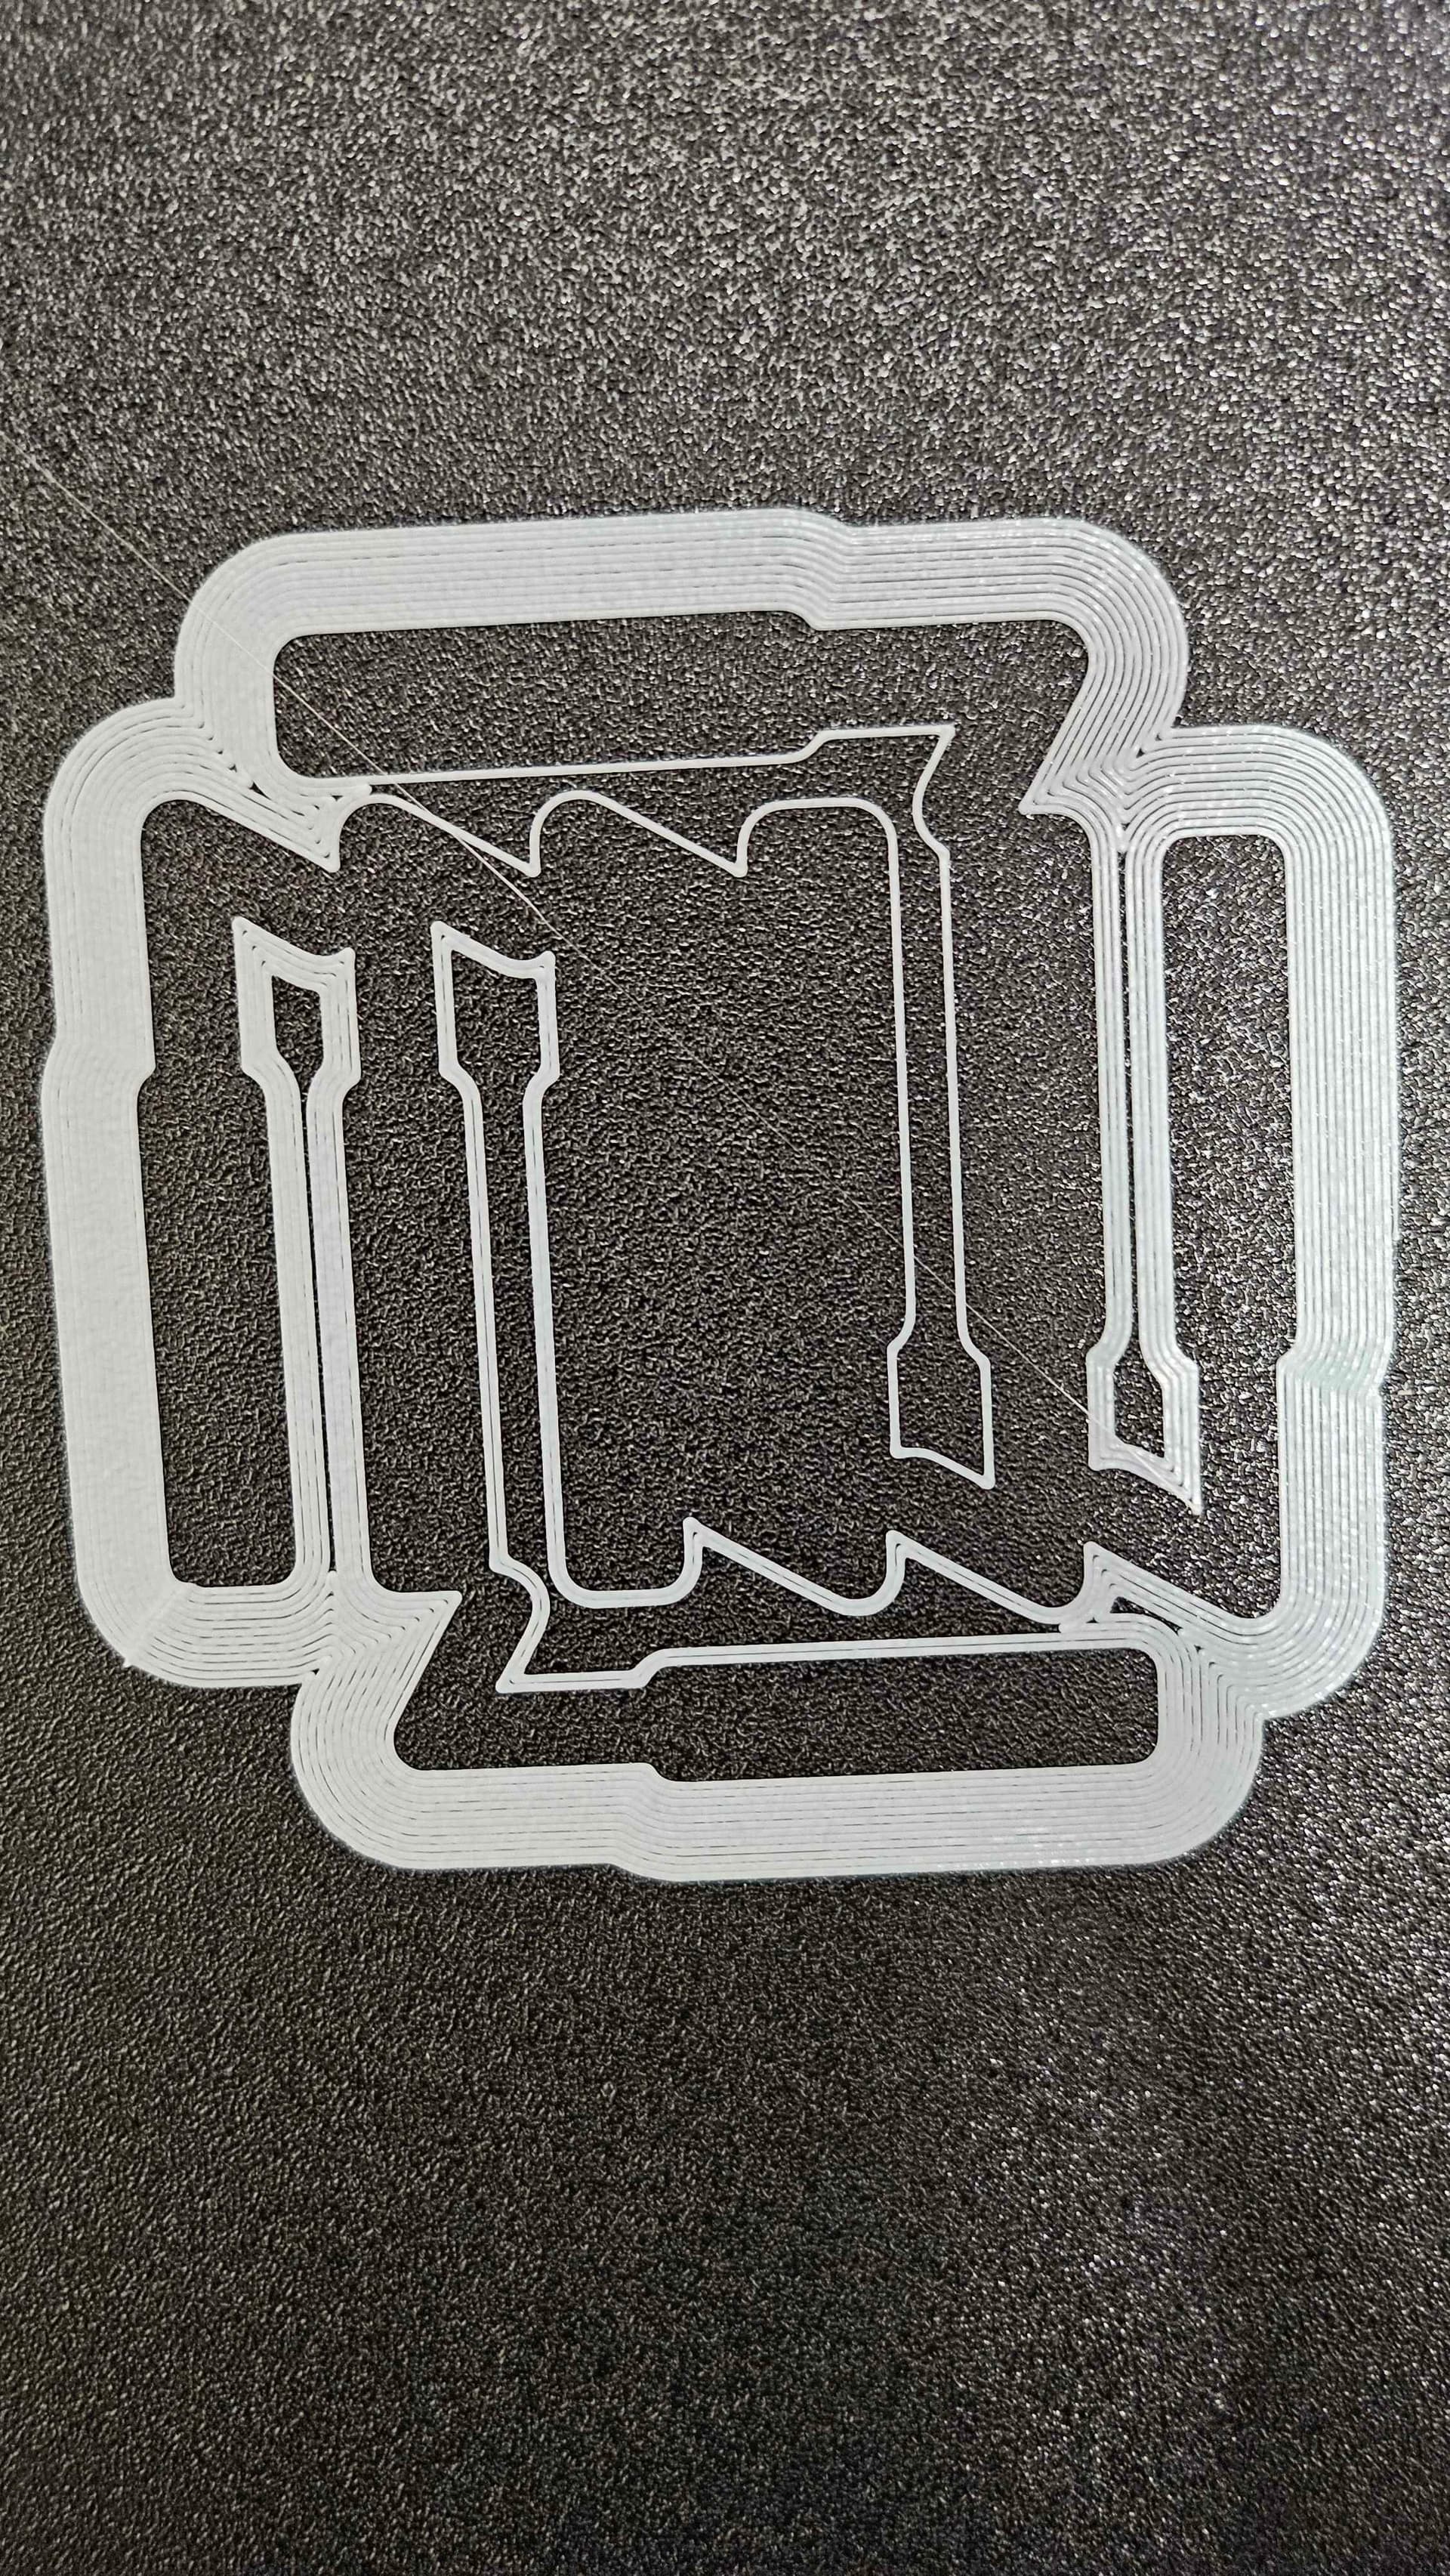
This is the test print post 5-6X X Tilt with the nozzle at 200C and bed at 60C. The front 2 squares are perfect while the back right is still a bit stringy. The middle square is finally one solid piece, although the surface is still rough
Download the level blocks to see if each side is the same height.
You can lower the Z down 1mm at a time once you get close.
If you see a gap on 1 side, turn the screw manually to make them both barely touch.
I never thought about this but it is worth looking into.
The Ace uses the nozzle tip as the probe. It doesn’t trigger until it feels the bed push back with an undocumented force. I’d guess that force would be somewhere around .1 to 1 newtons (10 - 100 grams). If the bed has any looseness the mesh won’t be accurate.
Make sure the rollers on the Y axis are snug. Check all the bed mounting hardware.
Also watch VERY closely as the printer generates the mesh. The Z axis could be binding VERY slightly when the nozzle touches.
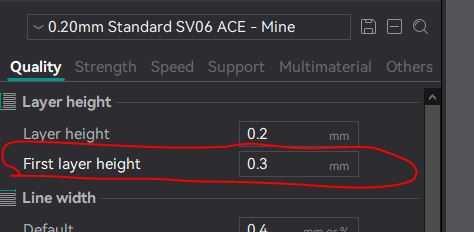
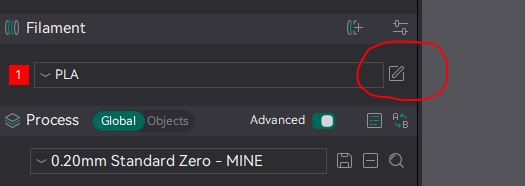
I changed the first layer height, increased the bed temperature from 60 to 70 and switched the slicer from UltiMaker to OrcaSlicer and the prints are coming out basically perfect now! All your help is much appreciated
how do you set the bed temp from 60 to 70? I just got my sv06 ace plus and am a bit confused. It seems like each gcode print piece comes with its own temp setting? Thanks @mango@Lion