I printed this bracket using PETG -Rapid. Printed normally until about 1/2 way, then the Y axis ( front to rear?) started shifting on the print. Part was firmly adhered to the bed. When I checked on it at 85%, you could hear the bed slamming hard at the rear of the printer on full travel when it tried to print at the front of the part. Don’t know if this is a bed issue, or a file issue. I printed 3 different parts from this “assembly”, and all of them exhibited this same behavior at 38MM up from the bed.
Could it be a lubrication issue or belt tenision? Temp in the open print enclosure was about 90 degrees when I stopped the print. Don’t think heat would cause this, but just mentioned it.
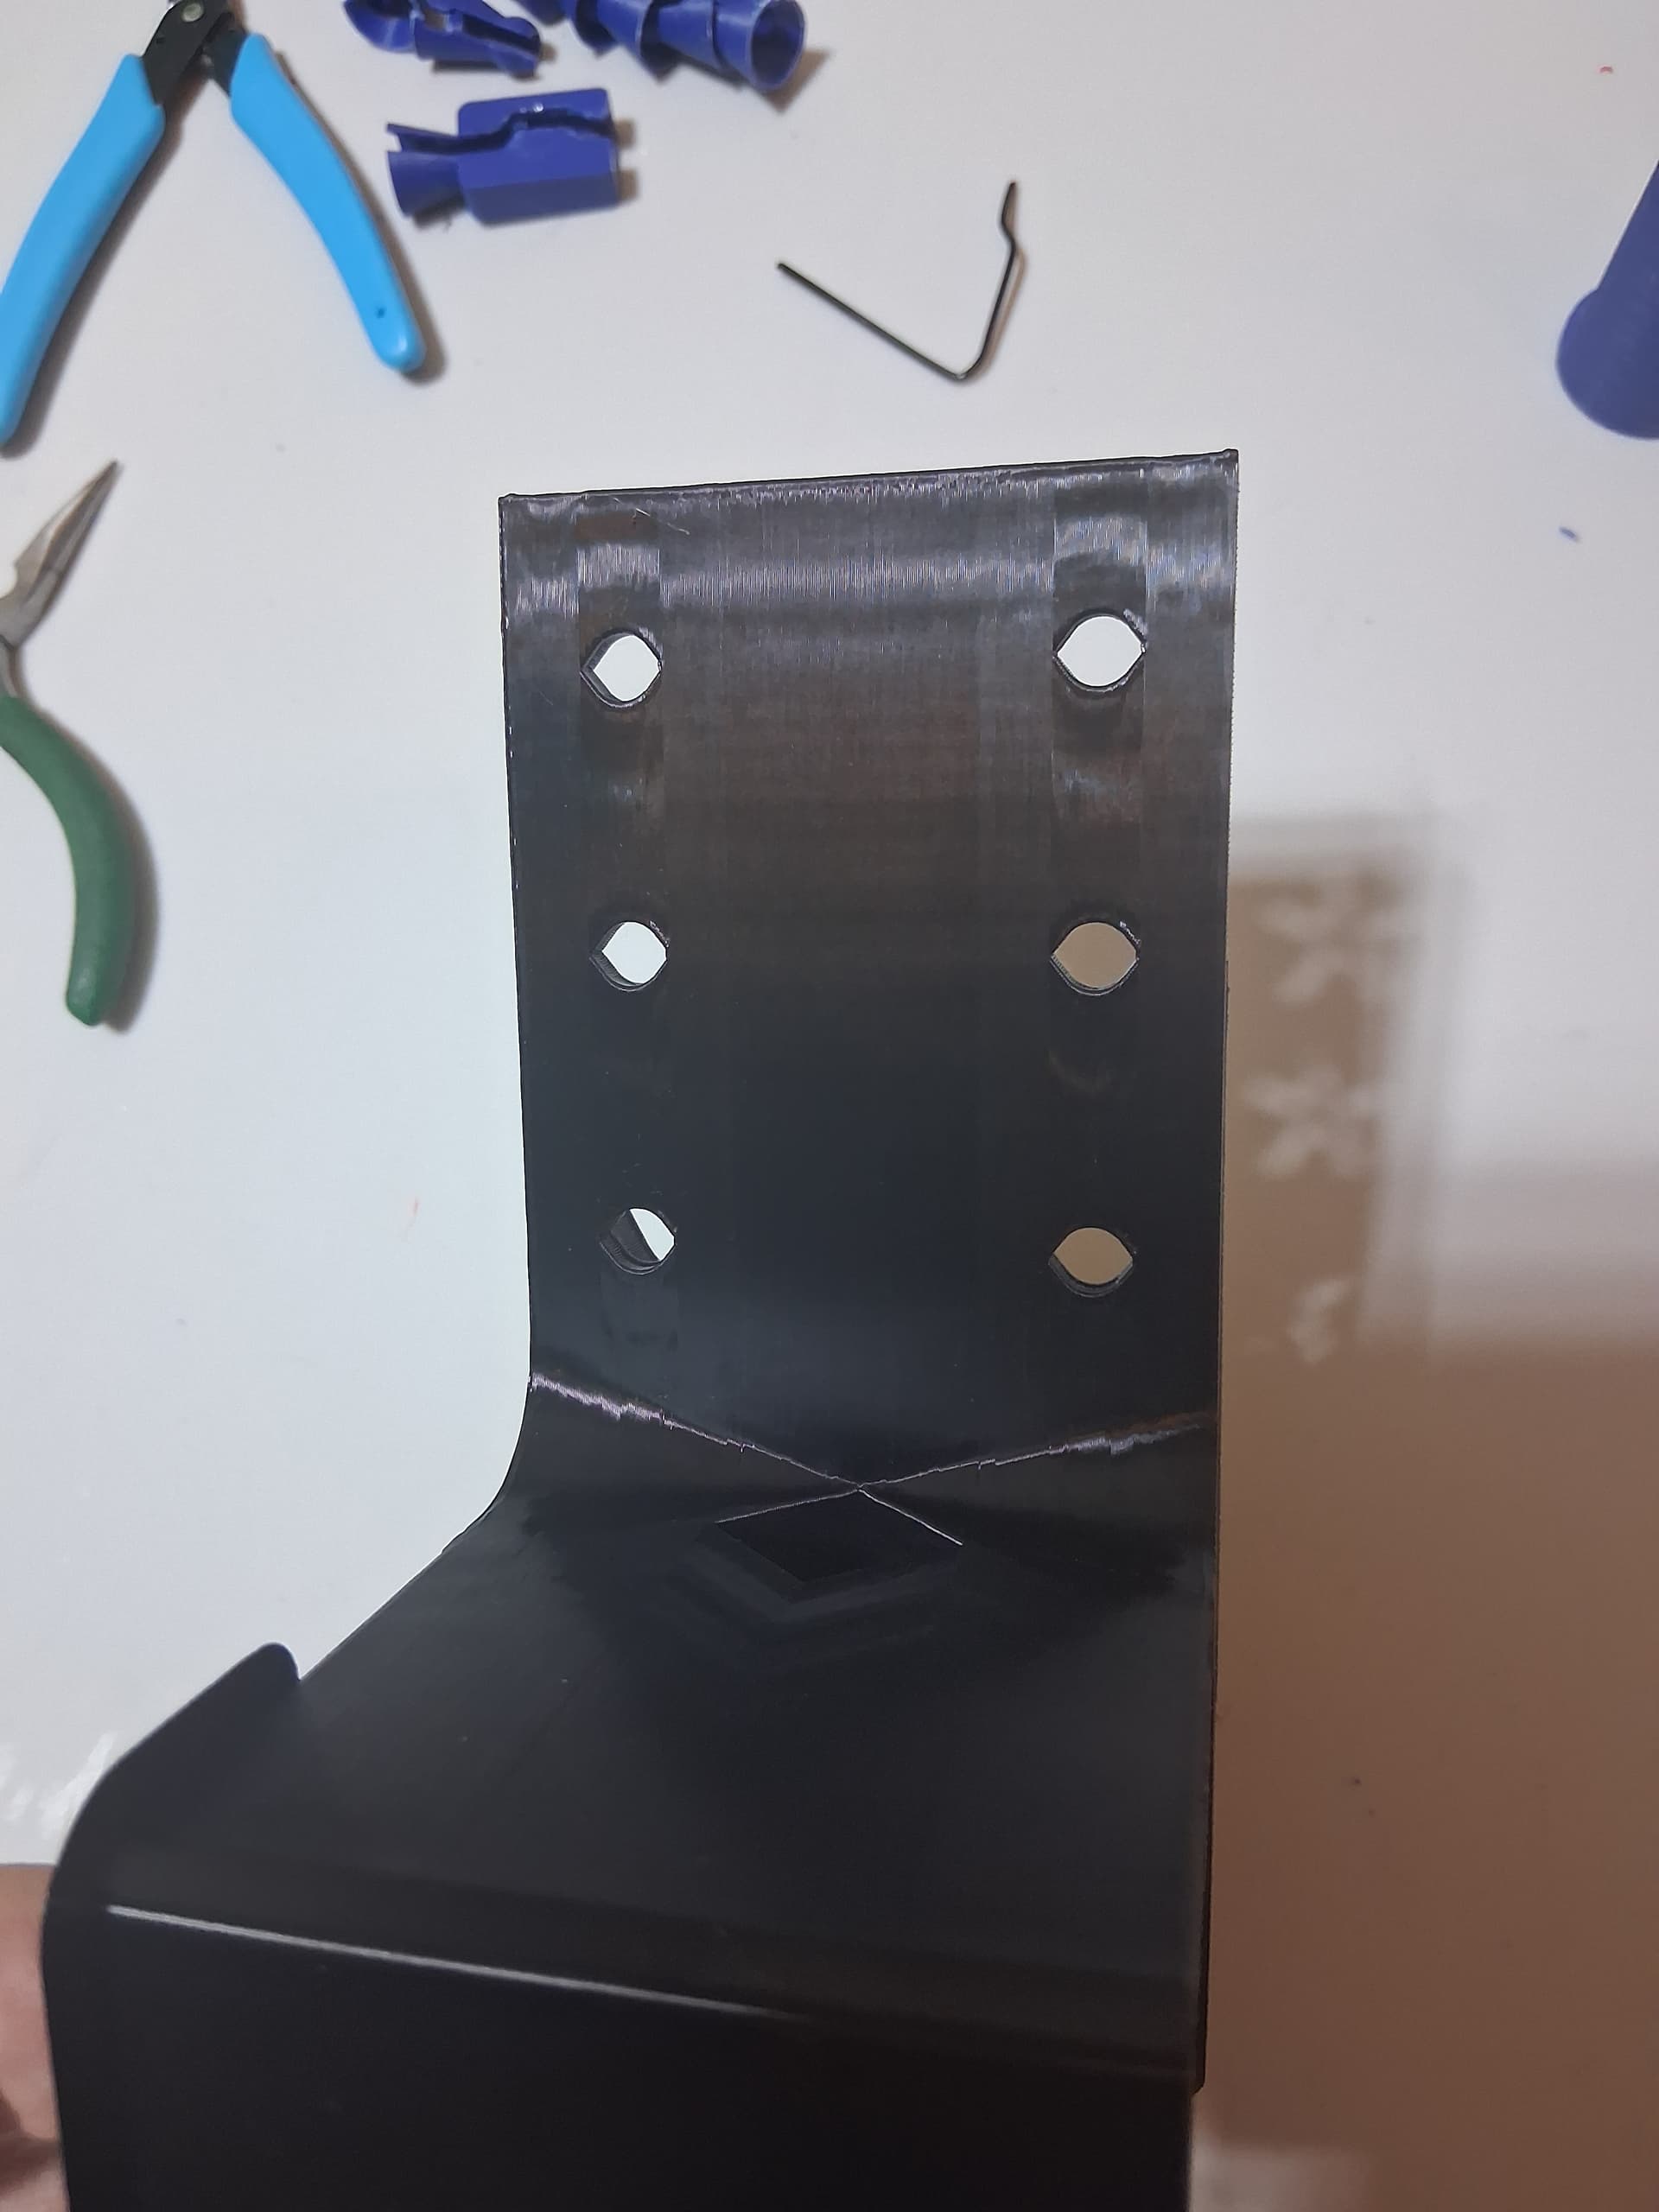
Part should have 6 holes aligned, 3 on bottom, 3 on top, for reference. Bottom holes were fine.
Your nozzle is catching on the print hard enough to “loose counts” on the Y axis.
There are several things that can cause this. For the object on the picture I’d GUESS your model is warping causing the corners the be higher than the middle.
Every line of plastic shrinks a tiny bit as it cools. The force is trivial for a single line but adds up when 500 or 1000 lines are all printed parallel. The amount or shrinkage gets bigger the further from the heated build plate you get. Printing slower and/or increasing cooling air flow will reduce the effect.
Put a pause in your g-code at 35mm height and put a straight edge across the top of the wall. I bet you’ll find the center is half a mm lower than the corners.
If practical the BEST thing to do is modify your model to interrupt the big flat plane with holes, slots, or ribs. Interrupting the hundreds of long parallel will allow your print to “absorb” the shrinkage with microscopic amounts of warpage at many locations instead of it all ending up at 1 corner.
Things to try:
Turn on “avoid crossing walls”
Switch to Gyroid infill (I don’t see any infill in your print but just in case)
Enable “Z hop” (0.5mm minimum)
Print slower and/or increase cooling
Rotate the model 45° on the build plate
Enclose your printer (a big cardboard box is good enough)
Thanks for the advise. I’m new to 3D, so learning a lot. Will try and incorporate your thoughts and reprint.
My original print was at 50% infill- wanted a strong result. Original design was at 20%, so I may ease back on that a bit. Will switch to Gyroid infill, and will rotate 45 degrees. Room temps are around 80 Degrees, but I can switch on AC to get it cooler. Unit is in an enclosure, but I printed with the door open. With door open, temps inside the chamber were 90 degrees. Is that too high?
Do you have a pic of the rest of your print..??
The shift is at the red line, but I’m kinda curious of what the other side looked like…the whole model.
I assume your chamber temp was 90 °F (32 °C) which is NOT too high.
eSun lists a “heat distortion temperature” of 68 °C for their PETG-HS
Assuming yours is similar I would use a bed temp of 60 °C and shoot for a chamber temp of around 50 °C if printing a big flat piece like yours. I’d drop both by 10 ° for a more rounded model.
That being said I would NOT use a high speed filament for a functional parts. Save it for models where shape is more important than strength.
If I wanted to print this model the only filament I’d even consider is PETG-CF. Stronger, stiffer, less shrinkage, and the mat finish hides layer lines. You need a .6 hardened nozzle though.
Lion, here are a couple more pic’s. I stopped the print at 85%, so the holes at the top ( supposed to be holes) never finished. Also included a pic of the threaded screw that was printed vertically at the same time. Black part makes it difficult to see the issues. Hope this works.
Screws are hard to print sometimes, could be the threads or the height.
Because you printed them both on the same plate…my guess is the screw started it all.
This part has me a little confused…with the part orientation on the Y Axis.
Just for the hell of it..read this thread.
SUCCESS! Thanks to all the input on this problem. I shifted the print 45 degrees, reduced the infill to 30%, changed to Gyroid infill, and closed the enclosure door. Enclosure temps were now 101F. No issues with printing either the screw or the bracket.