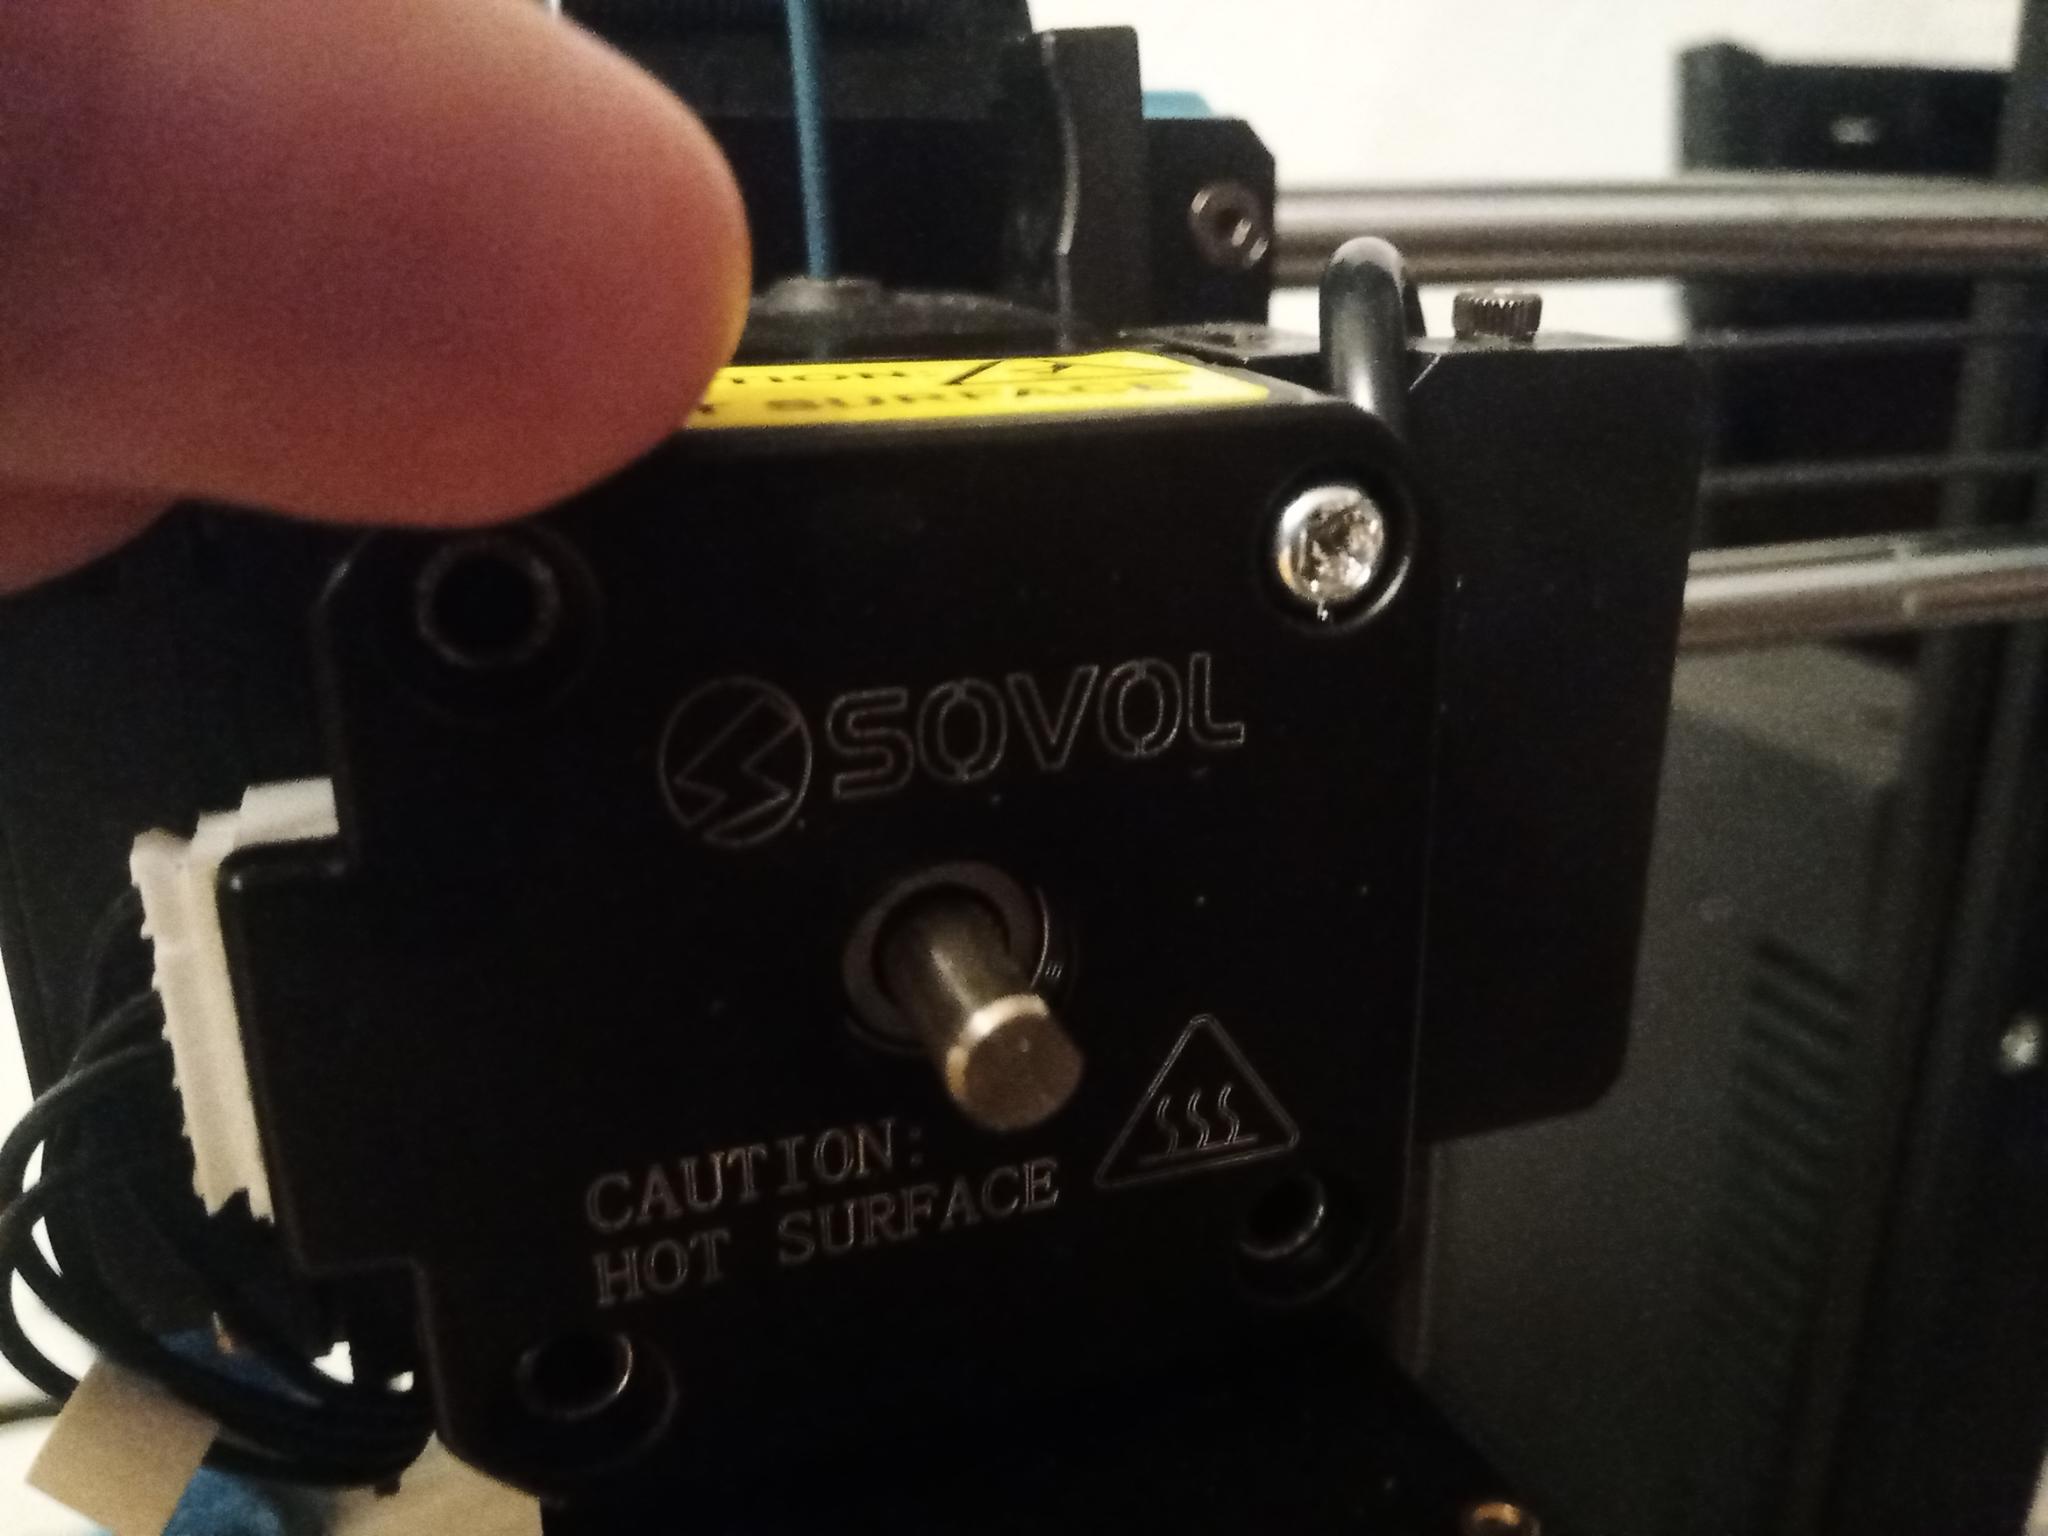
wanted to losen the screws of the extruder stepper motor but unfortunatley one was to tight. The one on the upper right. Now I ask myself how I can remove it.
I think I will first try to use one of this Screw extractor tools of my local hardware store.
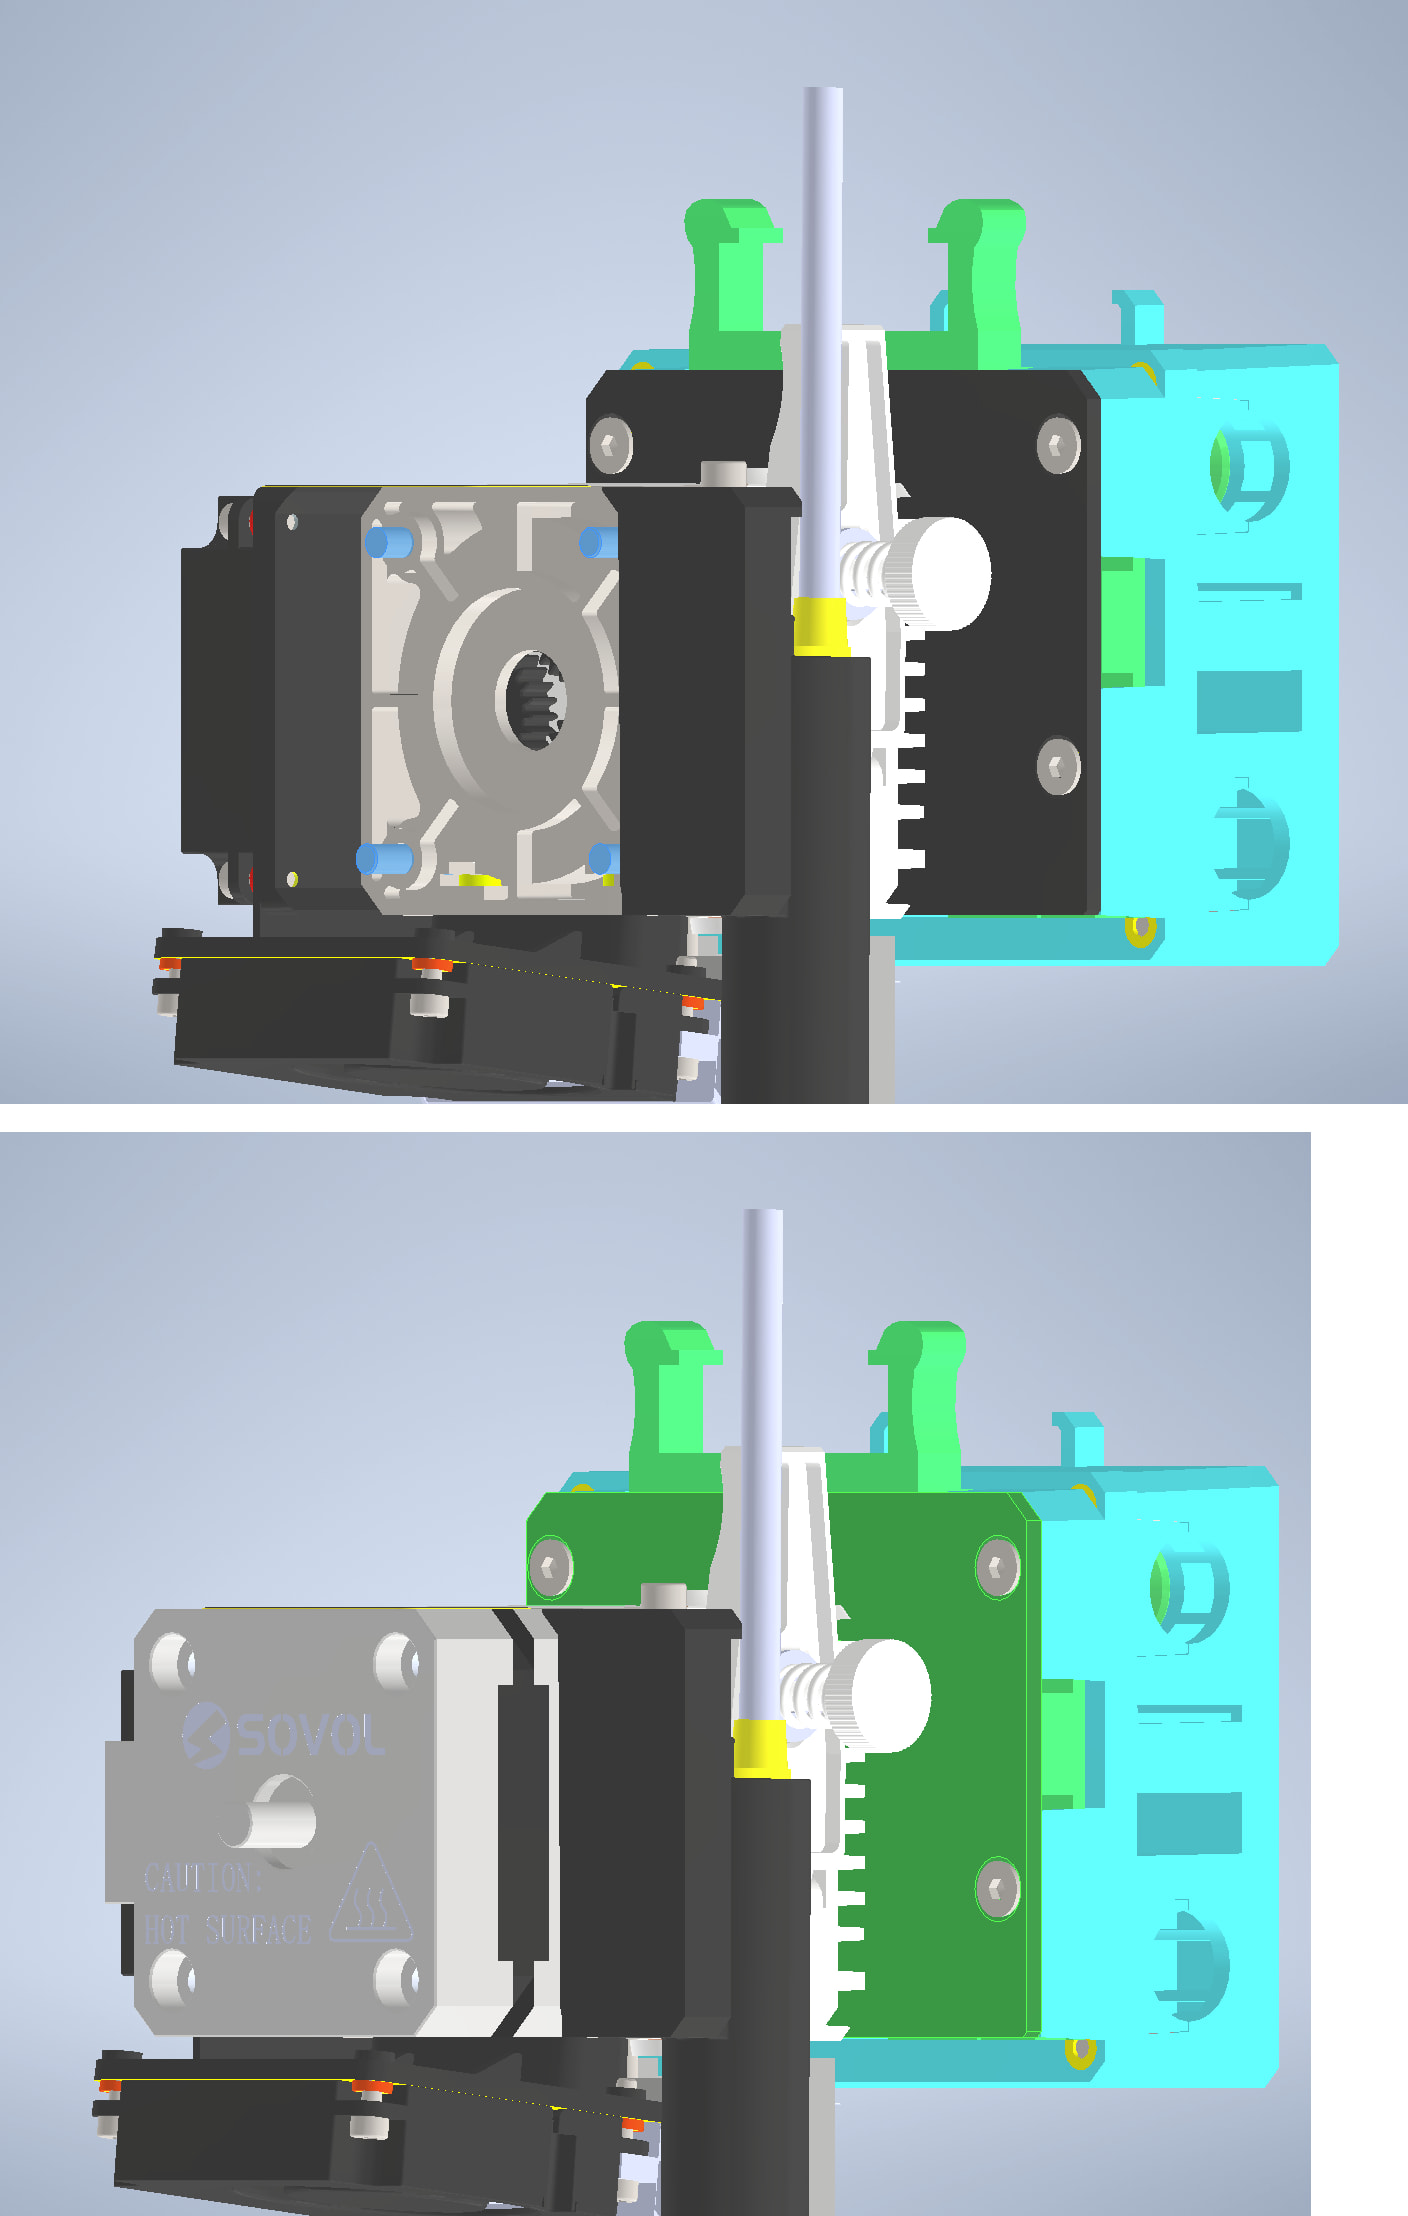
But if this fails I think I would need to remove the screw head with a driller and try to pull the motor out. I’m only worried that the motor could be fixed from the opposite side to this plastic piece “JXHSV06-08003-d Gear Seat_3”. Don’t understand in the assembly how the screws are fixed and located. Also couldn’t see in the SavageLau dissambly video.
Do you know how the motor is fixed? Where those cross headed screws are ending?
thanks for fast reply. Unfortunatley now it’s to late for that. Have no grip, even with a torx. For the screw extractor I will try to use WD40. Dont have frost spray. not sure if it’s common in our hardware stores
therefore I had the idea, if I drill with a 4mm driller inside the screw, I would remove the screw head and could perhaps slide out the motor. but I don’t know if it is screwed or glued from the backside.
Drill through the head with a 4mm or 3/16” drill bit. Stop drilling the instant the head starts spinning with the bit. Slide motor off and remove the remaining screw with plyers.
It is common for the motors to have 2 sets of screws end to end. The exposed screws hold the motor together. The mounting screws come in from the other direction.
That these screws are omitted from the 3D model leads me to think this is the case here. The screws holding the motor together are installed by the motor manufacturer and do not show up on Sovol’s BOM (bill of materials). The 3D model supplied to Sovol by the motor manufacturer didn’t include the screws when the actual motor does.
The fact they are cross head is a clue… Sovol exclusively uses hex heads.
Not sure if it will help here, cant quite tell from the picture if the screw is above or below the head. Back in the day when I ran into a stripped out screw I’d use a little battery powered Dremel from RS and make the screw into a slotted screw head. Sometimes I got lucky, and the head didn’t finish ripping it’s self up, when I unscrewed it with a flat bade. Otherwise, a drill and pliers like @cardoc mentioned would be the next option. If it snapped flush at the top, drill a pilot hole and tap the remaining out to clean the remaining material was sometimes also required.
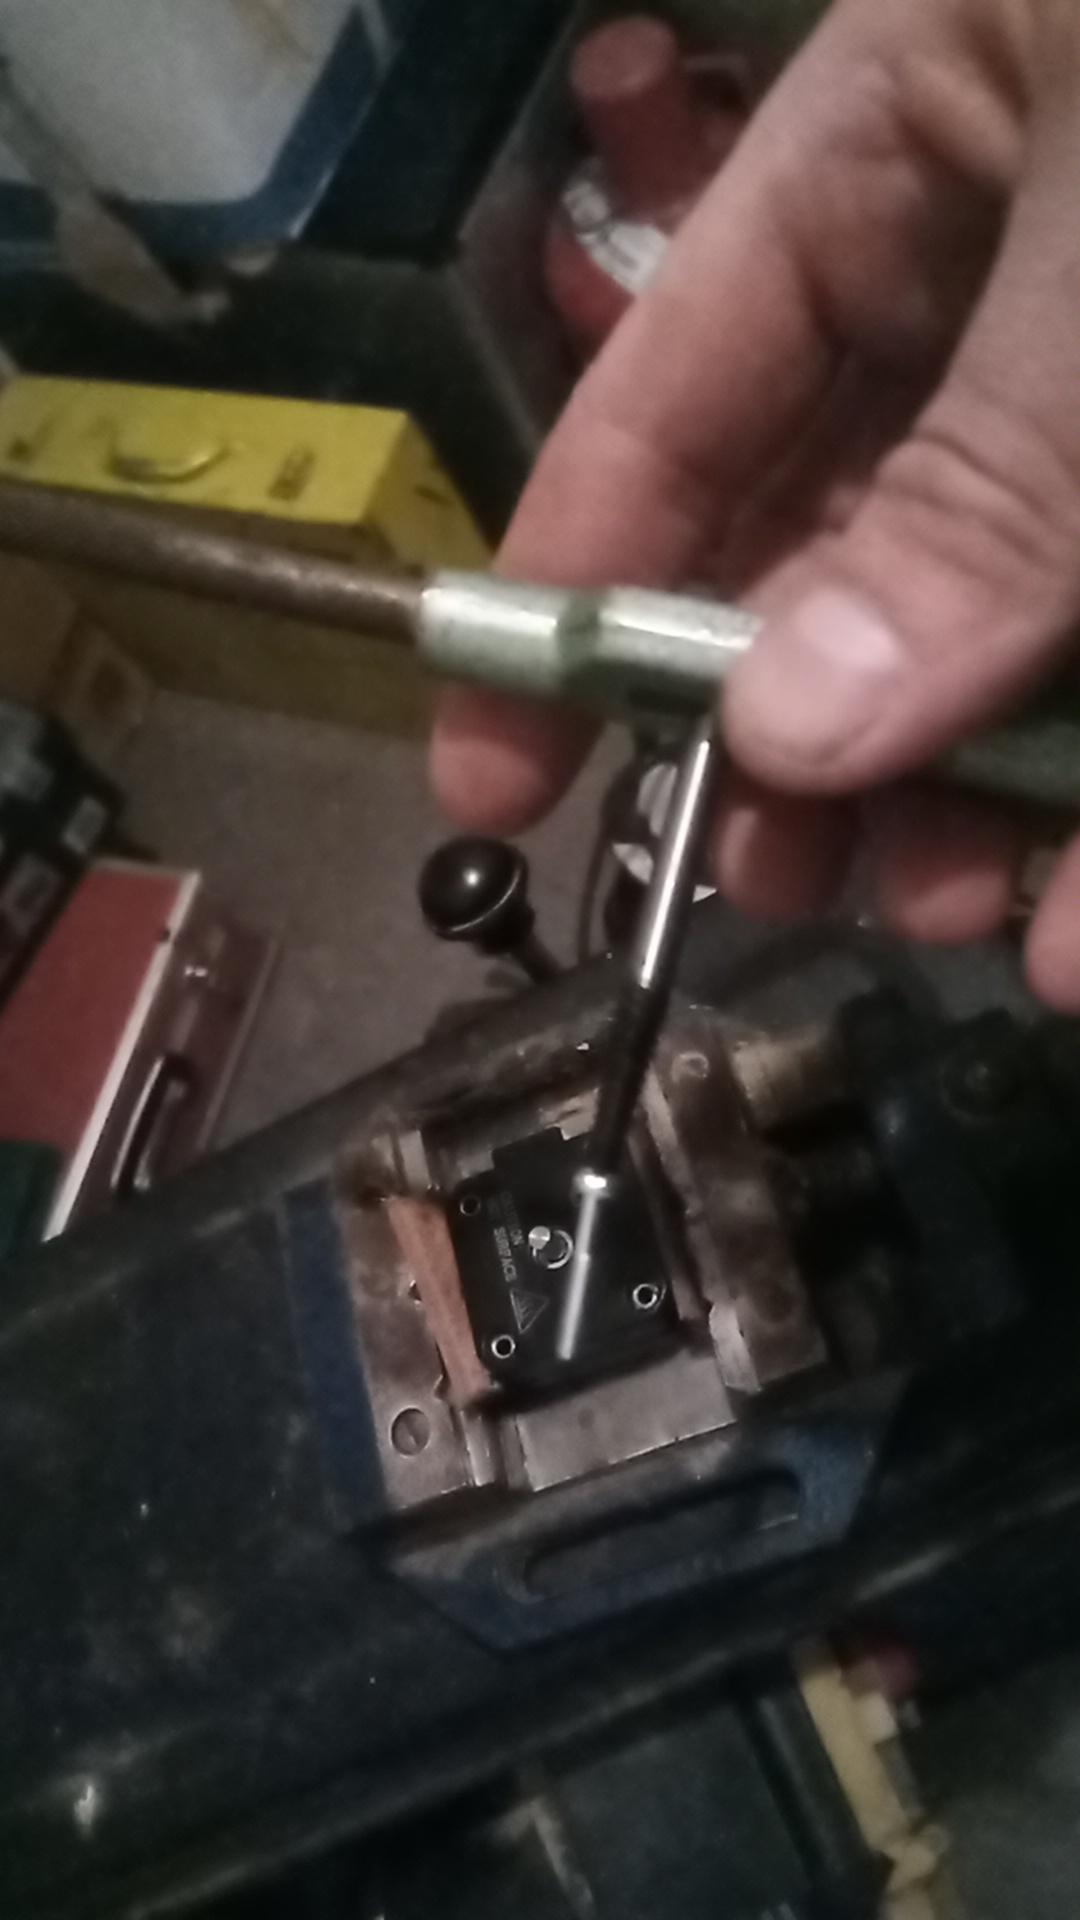
Process: increased contact surface to screw extractor by pre-drilling with 2.6mm driller. Used M4 screw extractor. Warmed up the motor with heatgun until "hand warm”, and appied a bit of bicycle chain grease from the backside to the thread. stabilized motor with clamp and applied good amount of vertical pressure on screw extractor while turning.
Learning: the motor is attached to the outer planetary gearing host (this plastic part : JXHSV06-08003-d Gear Seat_3”) with two screws from the gear side. the holes in the the motor, where the cross headed screws are located, have a threading at the end inside the motor. so partley the screws are only of cosmetic nature. (forgot to check if it is true for all four of them)
2nd learning: dissambly of the extruder is easy
following up question: wanted to replace the fan for the noozle cooling with the “nautilus” setup hosting a 5010 fan. but I have the impression that the air output is far higher than the tip of the nozzle. Should it be like this? Thought the fan should speed up the cooling time of the applied filament, not cool the nozzle? Edit: already solved. Guess I used SV06 version not SV06+ version. There is a remix in the net, for a taller version.