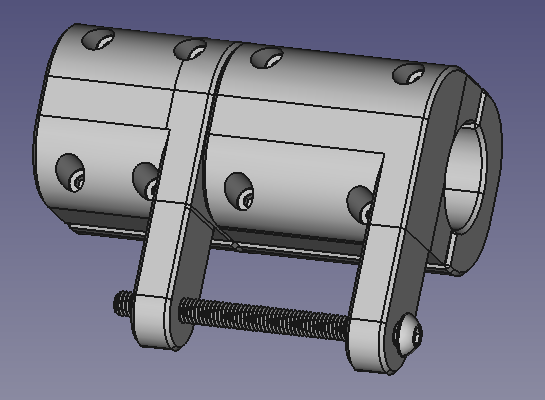
On Linux, I think you’ll be very happy with OrcaSlicer (I’m running version 2.3.1-dev which has updated Sovol profiles and a couple of other niceties), a browser to use the web based Mainsail interface to control the printer (I like the Brave browser), and FreeCAD. It’s an easy Linux installation and it’s now a stable and fully functional open source parametric CAD program that will be much easier to use for CAD than trying to use Blender which is more of a freehand 3D drawing tool. I recently installed and played with Blender for modeling organic shapes but I do very little of that. It can also repair open mesh STLs. I also have MeshLab installed and it can repair broken STLs as well.
In practice, I almost never use Blender or MeshLab. My tool chain is FreeCAD, OrcaSlicer and the browser to monitor and control the printer. OrcaSlicer talks to the Klipper based printer by sending the G code directly to the printer via WiFi. After that, I monitor the printer in a browser tab, where I can load and unload filament, preheat the bed, monitor and cancel prints, etc.
I recommend not watching the online FreeCAD video tutorials, although some are very good if you are serious about learning CAD. If you do watch, make certain it’s a recent video so you’re seeing something that applies to version 1.0. The user interface kept changing prior to that and earlier videos will have you trying to do things that don’t apply to the modern stable release of FreeCAD.
I’d recommend learning FreeCAD in what I think of as TinkerCAD mode. As soon as you run FreeCAD, select the Part workbench, and not the more complicated Part Design workbench. You can make the Part workbench the default when FreeCAD starts. The Part workbench allows you to design with solids - cube, cylinder, cone, tube, sphere, torus. It’s still parametric CAD but it draws the objects for you and you change the parameters to be the size and shape you want. You can then use Boolean operators to add these primitive shapes together, subtract one from another, or create an intersection of two parts. Then, you can use the fillet tool to round edges or create curved surfaces, and you can use the chamfer tool to bevel edges or create angled surfaces. Combining all of these simple operations together can make some surprisingly complex parts, and you can learn the “real CAD” as needed to do other tasks such as complex organic 3D shapes with engraved text. The YouTube videos are a great way to pick up those advanced skills one at a time, as you need them, in easily learned bite size pieces.
FreeCAD allows you to maintain full parametric control. After 3D printing a test part, you might decide it needs to be 2 mm longer, and a radius needs to be larger. You can simply edit the part in the tree diagram, select the feature you want to change, double click to open a dialog box and change the parameter. Most of my parts are simple repair parts or functional parts, but I think you’ll be surprised at the complexity of parts you can design quickly using FreeCAD with only the Parts workbench.
LED light mount for my motorcycle:
Elbow to repair a pressure washer inlet:
Back panel for my SV08 enclosure:
Back plate for rotary product photo booth:
Cheek rest for a carbine:
I CAD something every other day, so this is just a random sampling of screenshots. Today, I’m 3D scanning a pistol to make a custom TPU-LW pocket holster that’s a perfect fit.
![]()
![]()
![]()
![]()


